Thursday, July 11, 2013

Tri- Polish, Day 16/ June #4: Cherries


Hello everyone!

 Cherries
This started as stamping nail art, and after painting over and over it, it ended up like this. The red nail polish I used for the cherries is actually called Cherry!  I didn't  notice that  until now when I sit here writing. As you might have seen, I've shortened the headline a little. This is "The Tri- Polish Challenge". I wonder if I should start calling it "TPC, Day..." or do as I've done today. What do you think?

 Cherries


Sorry about the extra text on the photos lately. Today I've made the text bigger on some photos, more transparent on some, and placed it where it felt best on each photo. Do you have any ideas or advice? I'm thinking about changing the watermark.

 Cherries

What I did:

I started with purple nails, and used the rose stamping plate from Messy Mansion and a regular gold polish to stamp the leafs. Then I made two big pink dots, and added red, and mixed them together so that it could resemble cherries. Then I used a black striper to make two lines by the cherries. The leafs looked too sheer, so I tried to outline them. Not being good at that, I filled in the center of the leafs with black too. Then I found my tiniest round brush, and tried to paint gold stripes to make the leafs more naturalistic. But it kind of looks like I just put a lot of gold nail polish on the leafs. The gold glitter is supposed to resemble leafs, and the red glitter is supposed to resemble cherries. I also added gold glitter where I felt that something was missing, and on the tips, and top coated. I use Seche Vite. And I use it whenever I do something I like. I'm still so new to this that I have to save what's good (with a layer of top coat) before I ruin it. Because then if I'm very careful, I can an remove the bad stamping (or stupid thing I have done) with a brush dipped in acetone. After all this talking, I hope you're  ready for the rest of the photos :-)

Cherries

Cherries

Cherries

Cherries

Cherries

Cherries

Cherries

Cherries

Used:

GOSH: #571 Wild Lilac -purple
GOSH: #598 Bubble Gum -pink
H&M: Cherry- red
H&M: Run Baby Run -gold
H&M: Black -nail polish with striper brush -from a set with white, red and black
Orly: Rockets Red Glare - red glitter
Deborah Lippmann: Boom Boom Pow- gold glitter
Messy Mansion: MM07 -stamping plate
tiny brush
dotting tool


Cherry, Bubble Gum, Wild Lilac, Run Baby Run, black striper, Rockets Red Glare, Boom Boom Pow


This is the last Tri- Polish nail art for June. I'm not sure if I should continue with this challenge, because I often post too late. And I have very many swatches that I should have showed you, in addition to other nail art ideas. I've also started to really like stamping.

Below you can see what the other participants made for this challenge day!


Lani


Wednesday, July 3, 2013

The Tri- Polish Challenge, Day 15/ June #3: Dog Finger Painting- inspired by Jenna Marbles


Hello everyone!

Dog Finger Painting


My Dog Finger Painting nails are inspired by Jenna Marbles' Dog Finger Painting YouTube video. If you haven't already seen it, here it is:


When I saw her video, I immediately knew that I wanted to make something like this on my nails.

Dog Finger Painting


As you see, the dogs walked very carefully on my nails. But after I took the photos, I noticed that they had left some dog hairs... So, don't look too closely! And I accidentally hit the wall with my ring finger nail before the top coat dried. I wish I had taken photos before that.

Dog Finger Painting


I used all the Tri- Polish Challenge colors for June (pink, red and purple), and all the other colors we can use; white (regular and stamping polish), black stamping polish, and regular gold and silver nail polish. And my two dogs Cheeky Jumbo 9 Wild at Heart (long name :-) ) and Bundle Monster -323. Cheeky is the one with the small paws. Bundle Monster is bigger, and looks nearly like a little bear. I painted the accent nail pink, and used a sponge to make a purple- pink- red gradient. The red polish stained my skin, so I don't think I will use the red for gradients again.

Dog Finger Painting


For those of you who haven't seen it already, here is a photo and a list of my Tri- Polish Challenge polishes for June:

GOSH #598 Bubble Gum -pink
GOSH #571 Wild Lilac -purple
H&M Cherry- red

My  Tri- Polish Challenge nail polishes for June


As usual you will find thumbnails to the other Tri- Polish Challenge participants' nail art for Day 15/ June #3  below! (Yes, I was supposed to post this last week, but better late than never...)


Lani

No animals were harmed during the making of this nail art.

Monday, July 1, 2013

Canada Day Nails


Hello everyone!


The Adventures In Stamping challenge yesterday was Independence Day or Canada Day, and I chose Canada Day. The flag was my inspiration. Happy Canada Day to all of you who are celebrating today!

Canada Day Nails


I used the maple leaf image from my new Pueen set, and my new and first white based glitter which I love, and I finally used my red croc effect top coat. Love the effect. The Jolly Jewels glitter was opaque in two coats, but I applied one more coat on my pinkie because I was curious about the glitter. And on the index finger you can see what it looks like over a white base. I used one coat, and dabbed a little more on. I wanted the nails to look a little different.

Canada Day Nails

Canada Day Nails

Canada Day Nails

Canada Day Nails


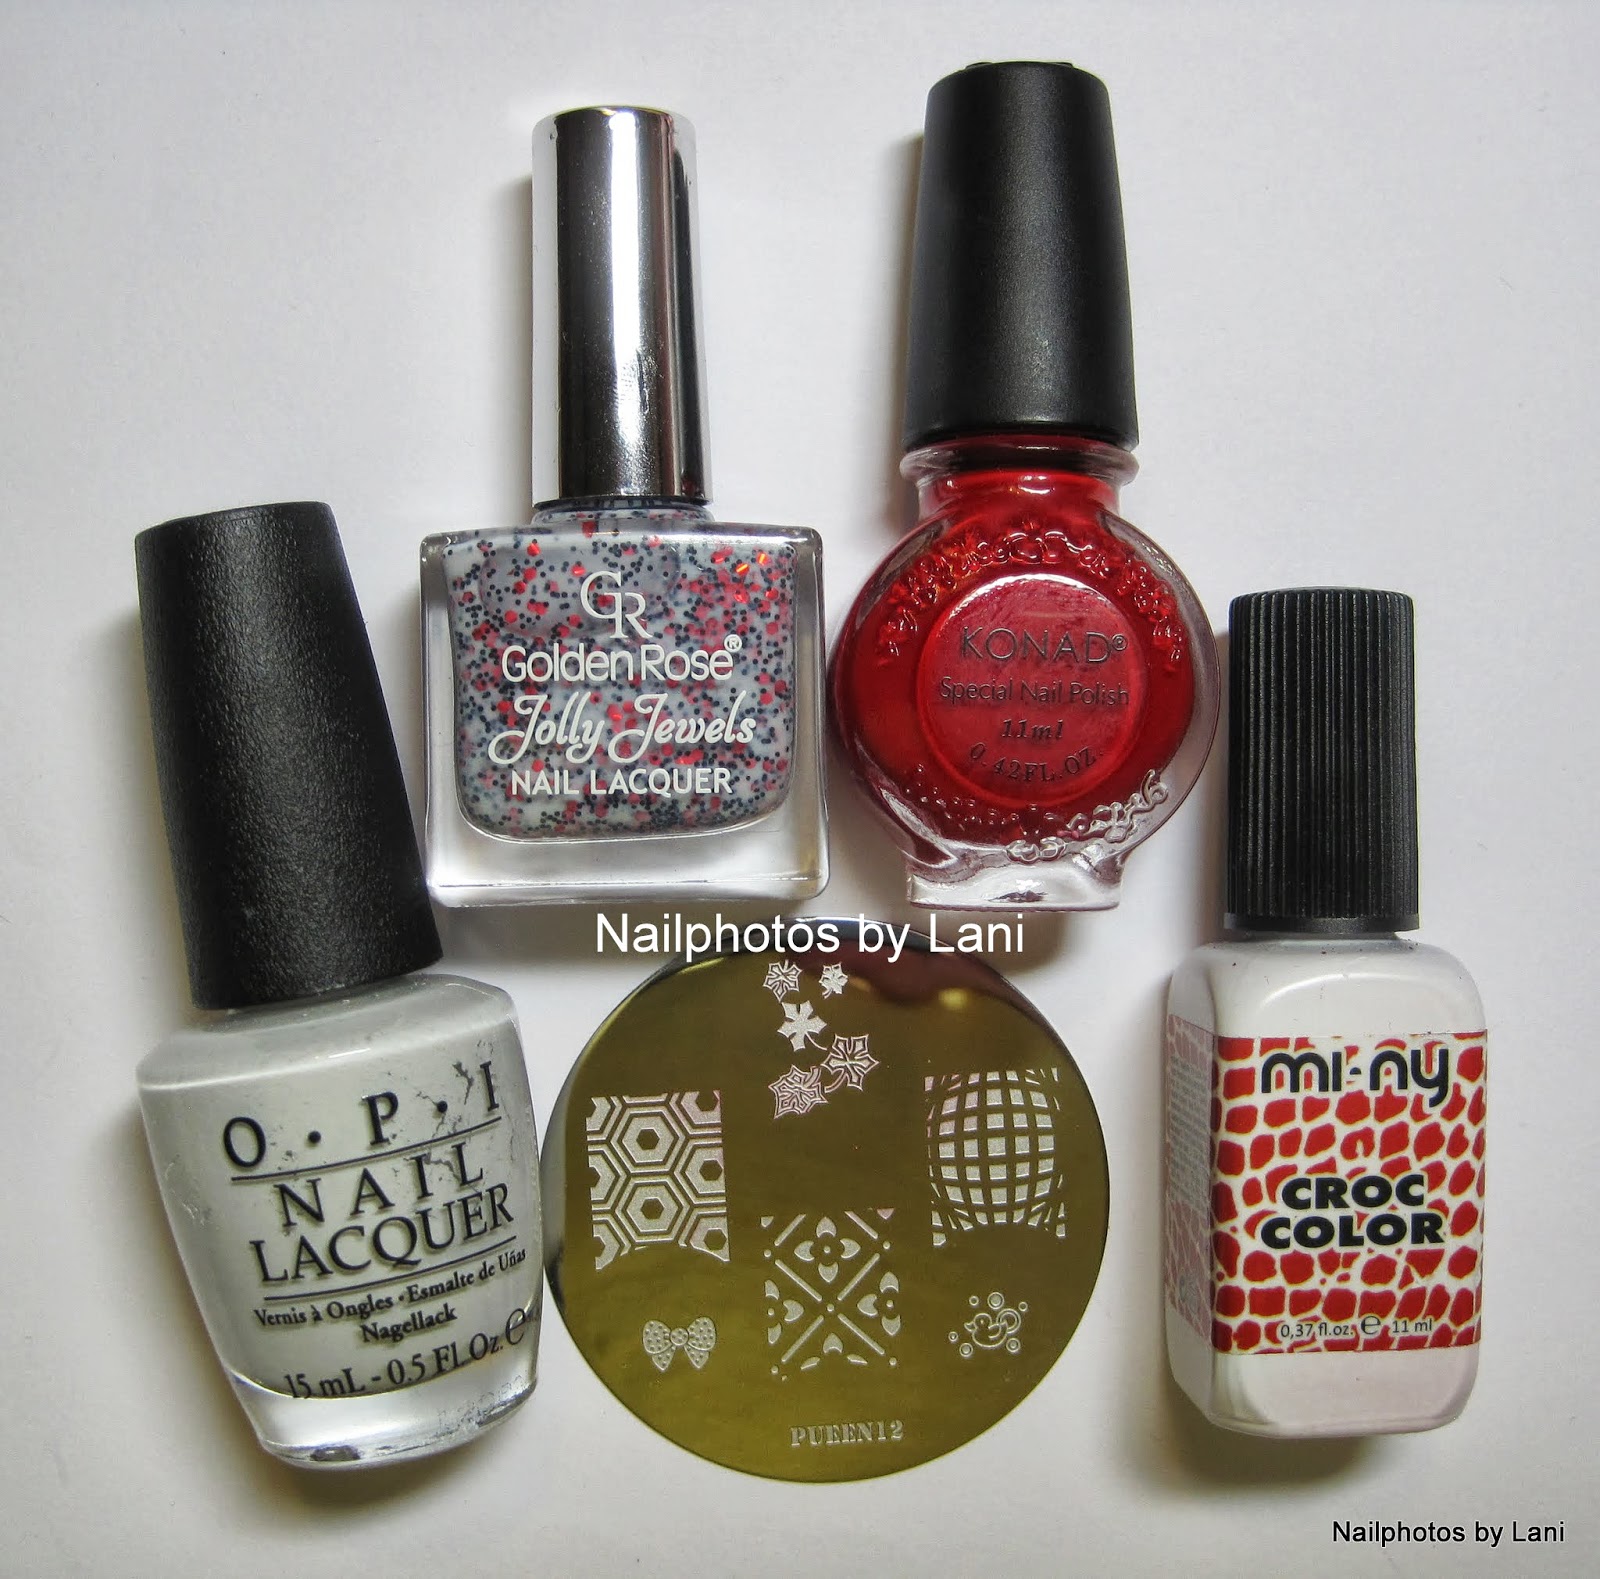
Used:

OPI: My Boyfriend Scales Walls
Pueen 12 (stamping plate from the Sumptuous Gallery set)
Konad SP Red (stamping polish)
Golden Rose Jolly Jewels #110 (red and black glitter in a white base)
Mi-Ny Croc Color: Intense Red 2 (red croc effect top coat)

Used to make Canada Day Nails

Canada Day Nails

Canada Day Nails
Canada Day Nails


Lani

Sunday, June 30, 2013

How to follow Nailphotos by Lani. Google Reader will be gone tomorrow!

Hello everyone!


You have probably already heard that Google Reader will be removed by Google July 1, which is tomorrow.

This is how to follow me after Google Reader is gone:

If you read my blog trough Google Reader, I recommend you to follow "Nailphotos by Lani" on Bloglovinto not miss posts. You can also find my future blog posts on facebookG+, and TwitterIt's also possible to follow "Nailphotos by Lani" by email, as you can see on the right side.

I hope this was helpful!


Sincerely,
Lani

Saturday, June 29, 2013

MI-NY: #56 KLIMT (on it's own and used for nail art/ layering)


Hello everyone!

MI-NY: Klimt


MI-NY: KLIMT is a pastel turquoise cream nail polish. It's a 1- 2 coater, and very easy to work with. The color is a little bit greener than on my photos. I bought Klimt in February, and have already used it several times. So now I want to show you what it looks like on it's own, and used for nail art. And I'll try to update this post when I use Klimt for nail art or layering in the future. This first photo was one of my entries to MI-NY' swatch competition called WE LOVE NAILS.

MI-NY: Klimt


I swatched some of my MI-NY polishes, but didn't get time to swatch all of them. I had planned to write blog posts about them too, but haven't had time or been sick...

MI-NY: Klimt


Color comparison

I called the color pastel turquoise, but some would perhaps call it blue-green or pastel teal. As I mentioned Klimt looks a litte more green and less blue than on these photos. Compared to my other polishes in this color family, Klimt is like a pastel version of H&M "Bella's Choice". Klimt is more pastel than Picture Polish "Honey Dew", but "Honey Dew" is a little more green. H&M "Mint Madness" looks like a dusty pastel green, and not turquoise at all, compared to Klimt.

MI-NY: Klimt

MI-NY: #56 Klimt used for nail art or layering:


1) One of the last challenges in the Sat- ART- Day Club, back in February, was "Dotting tools". This was my entry for MI-NY's nail art contest called "WE LOVE NAIL ART", but I didn't win. Details about the mani and more photos in the blog post.

Klimt used for nail art

2) This was made for World Ovarian Cancer Day. The first photos are taken before adding the flakie top coat. I don't think I've shared the first two photos before. Details and more photos in the blog post.

Klimt used for nail art

Klimt used for nail art

Klimt used for nail art

Klimt used for nail art
 With the flakie:

Klimt used for nail art


3) MI-NY's flakie "I LOVE LONDON" layered over Klimt and other polishes. This was an attempt to show what the flakie looks like over different colors. I made it for MI-NY's swatch contest; "WE LOVE NAILS".

MI- NY: "I Love London" layered over Klimt


4. Love is Love - Pastel Rainbow Hearts- Valentines Day nails #8, NPC's Valentine's Day Nail Art Challenge, and #31Nails2014 Day 19 Rainbow


As I've said before, MI-NY is an Italian brand, and according to their answer on facebook they do not test their products on animals. Their web site has a list of MI-NY stores.


Lani

Tuesday, June 25, 2013

The Tri- Polish Challenge, Day 14/ June #2: Midsummer/ Midwinter French


Hello everyone!


The challenge in Adventures in Stamping on Sunday was to make a french manicure. I also wanted to make Midsummer Night nails, but because I have readers in the southern hemisphere too, I chose to make a combination. But guess who broke a nail, and had to cut off what was supposed to be a french manicure?Therefor I stamped summer flowers, and made a diagonal snowy french. I also used the rules for the Tri- Polish Challenge. I used all three of the TPC colors. (I told about them here.) You can find thumbnails to the other TPC participants' "Day 13/ June #2 Nails" at the end of the post. But first more photos, a list of what I used, and then how I did it step by step. This is the photo I've shared earlier:

Midsummer/ Midwinter French

Midsummer/ Midwinter French

Midsummer/ Midwinter French

Midsummer/ Midwinter French

Midsummer/ Midwinter French

Midsummer/ Midwinter French

Summer Solstice/ Winter Solstice


If you live on Hawaii where there is a pleasant temperature year round, and the sun rises and sets at about the same time every day, I can't imagine that summer solstice is a big day for you, but it is a special day for those who live closer to the poles, because it's the longest day of the year. I haven't celebrated midsummer since I was young, but it's always a little sad that it's getting darker and darker and that we are getting closer to winter again, but at the same time we have many summer days ahead of us, and it's nice to enjoy the long summer nights. On midwinter day I'm usually just happy that the days will get longer, and that summer is on it's way. It's so much stress to get the nails ready (for photographing) before the sun goes down in winter, but thanks to an Ott- Lite lamp it's possible to have daylight whenever I need it.

Midsummer/ Midwinter French

Used:


GOSH #598 Bubble Gum -pink
GOSH #571 Wild Lilac -purple
H&M Cherry- red, used for stamping
Konad: SP White- stamping polish
Stamping plates: Pueen 25 (flowers, snowflake), HB 23 (snowflakes)
Striping tape: white (as guides),  pink metallic (for decoration)
Stamper & Scraper from KKCenterHk

You will also need base coat, scissors, a brush, a little glass for acetone, and lots of fast drying top coat.


Here is a closer look on the polishes I used for stamping:

Midsummer/ Midwinter French

Midsummer/ Midwinter French


What I did:


After some testing, I decided to go for the design on my pinkie. As you see on the photos below, I painted the nails pink, and stamped flowers with the red polish and Pueen 25.

Step 1


I made a diagonal purple stripe with the brush (from the bottle) on the first nail. But now I used striping tape as guides.

Step 2 and 3


And stamped snowflakes with Konad SP White and HB23 over the purple tip. I was very careful when I placed the snowflakes, and even used a brush with acetone to remove every tiny little white spot that had crossed the line, before I applied topcoat. Here you see what it looked like before that:

Step 4


But I felt that something was missing, and added the pink metallic striping tape. (I lost the striping tape on my ring finger twice, although I covered it with top coat. Not sure what I did wrong, or if it is something with the tape.) If I had thought of using striping tape earlier in the process, I probably wouldn't have to think so much about making a clean line...

Step 5


I always use a base coat first, and top coat between each step to make it dry faster, and to be able to remove the image if I don't succeed with the stamping. I feel a bit stupid for using a Q- tip dipped in acetone (instead of a flat brush), and then have to redo a nail. It was much easier to use my "clean up brush"...

Now you can take a look at my fellow TPC participants' nails! Just click on a photo if you want to see their blog post.


Lani