Showing posts with label gradient. Show all posts

Sunday, November 16, 2014

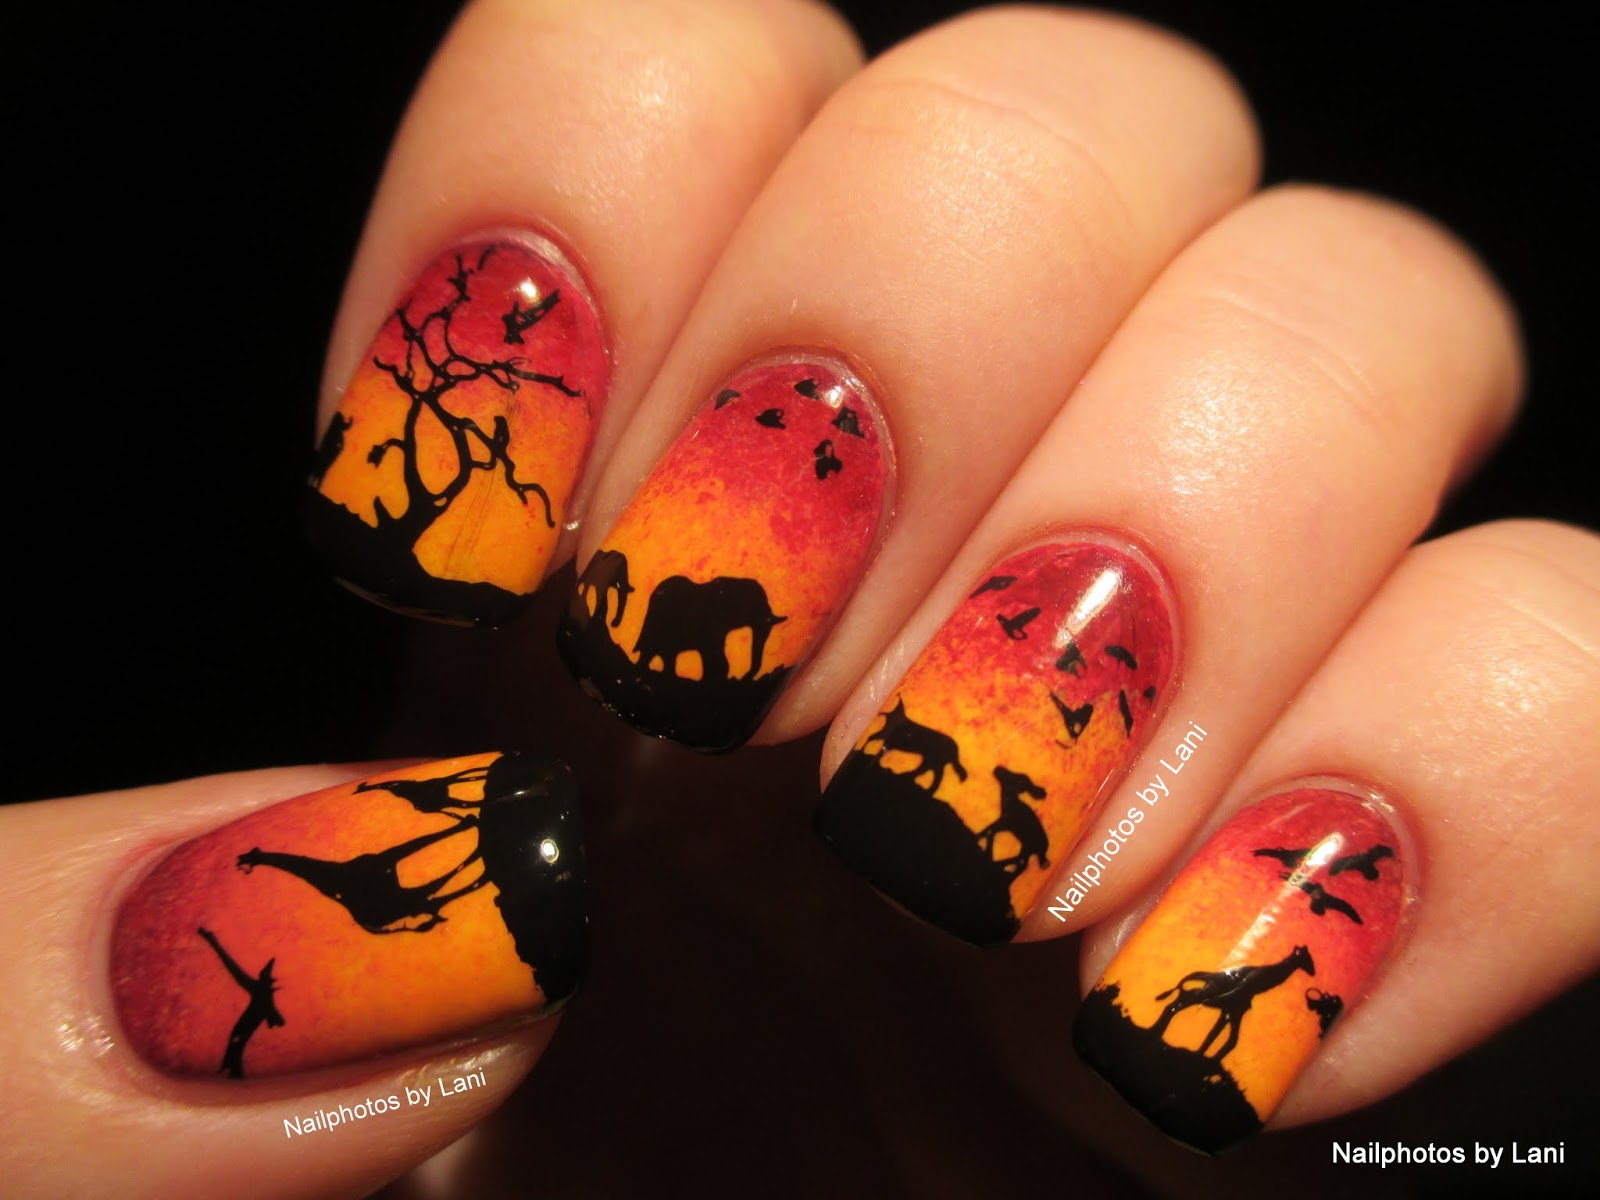
#52WPNMC - Wild Animals - African Sunset/ Sunrise Nails - stamping nail art


Hello everyone!


I had wanted to make African sunset/ sunrise nails for a long time, but when "wild animals" and "wildlife" were the challenges in two facebook groups, I finally made this today. All the pictures are taken inside, because we only have a few hours of winter daylight this time of the year.
Edited: I've added one photo taken in daylight, where you can see how shiny this mani is:

Daylight


What I did:

I was already wearing a coral creme nail polish called Coral Reef by Mineral Fusion (3 coats + Seche Vite.) First I made a red- orange gradient, then I stamped the African animals and the tree on. I used two MoYou London stamping plates; I used #04 from the Kitty Collection for the big giraffe on the thumb. All the other images are from Explorer Collection #23. (#23 is perfect for us with small nail beds, but they have a XL plate with bigger images.) I also used the black Konad stamping polish to paint the "Savannah" tips.


Products used: 

Gradient:
Ruby Kisses: Cheesum (orange)
Mineral Fusion: Coral Reef (coral)
Gina Tricot: #146 The red (red)
Gina Tricot: #7 Zinfandel (dark red)
a stamping plate as palette
a dotting tool to mix the colors
a piece of a car sponge to make the gradient

Stamping:
MoYou London: Explorer Collection #23 (plate for small nail beds. They have a XL size too)
MoYou London: Kitty Collection #04 (big giraffe)
Konad SP Black (stamping polish)
marshmallow XL stamper

To avoid problems, I used different top coats; HK Girl over the gradient, and Seche Vite after the stamping.

The index nail is broken again, so had to glue it and use silk wrap and resin.


Below you can see what the other 52 Week PICK N MIX Challenge participants made. This week we could make a yellow mani, wild animals nail art, or combine the two prompts.

Lani


Sunday, October 12, 2014

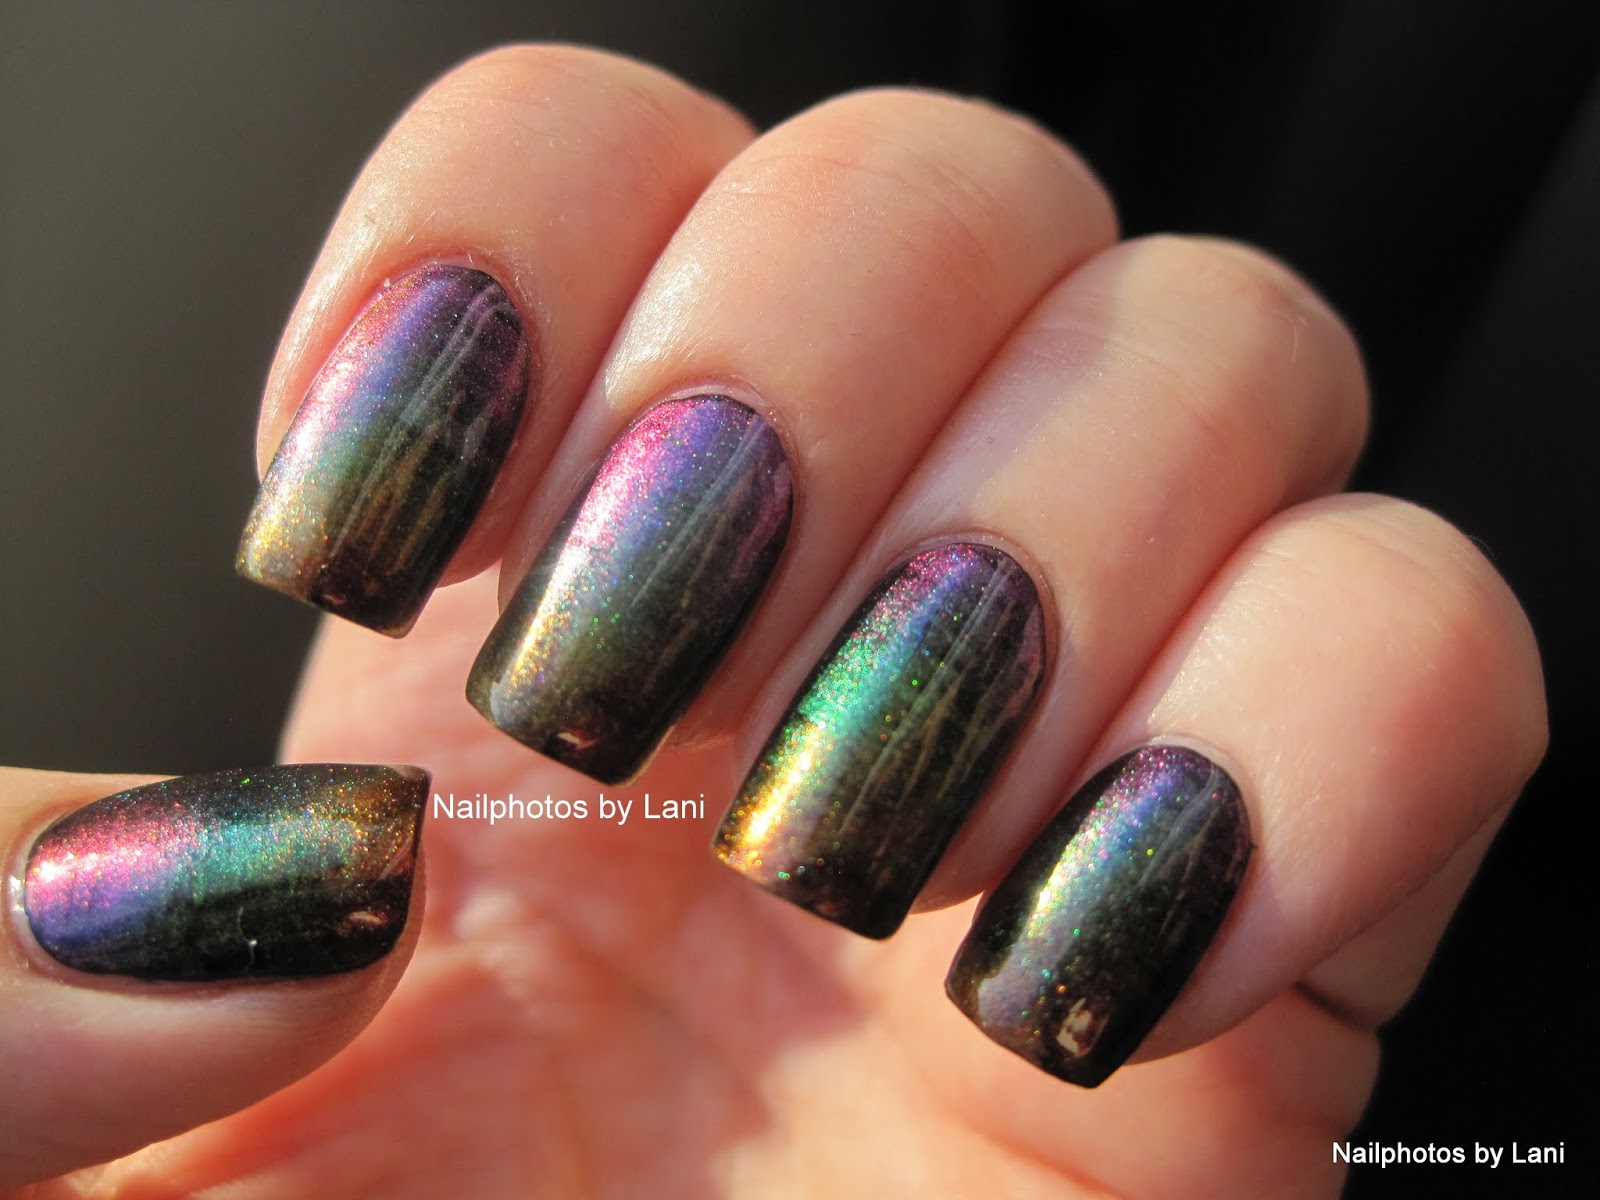
52 Week PICK N MIX Challenge - 3 colour gradient


Hello everyone!


The prompts for this week are "3 colour gradient" and "pink". I've already showed you my pink mani. This is my gradient. To see my photo tutorial and read how I made it, click here. This was the base for a stamped manicure; Autumn: Leafs over a Multichrome Gradient.


I used:

fast drying base coat: IsaDora: #600 Clear

black polish: GOSH :Nero
a fanbrush
a toothpick
and 3 multichromes from Enchanted polish:

Enchanted Polish: Magical Mystery Tour 
Enchanted Polish: Hey Jude
Enchanted Polish: I Am The Walrus

fast drying top coat: Seche Vite

a fake nail for my broken pinkie


I had to publish this before the deadline. Now I've added more photos:

Daylight:


I think the rest are taken under this LED lamp.


If any of you nail polish makers are reading this; Please make some pastel multichromes and bright multichromes! :-)


Lani

Wednesday, September 10, 2014

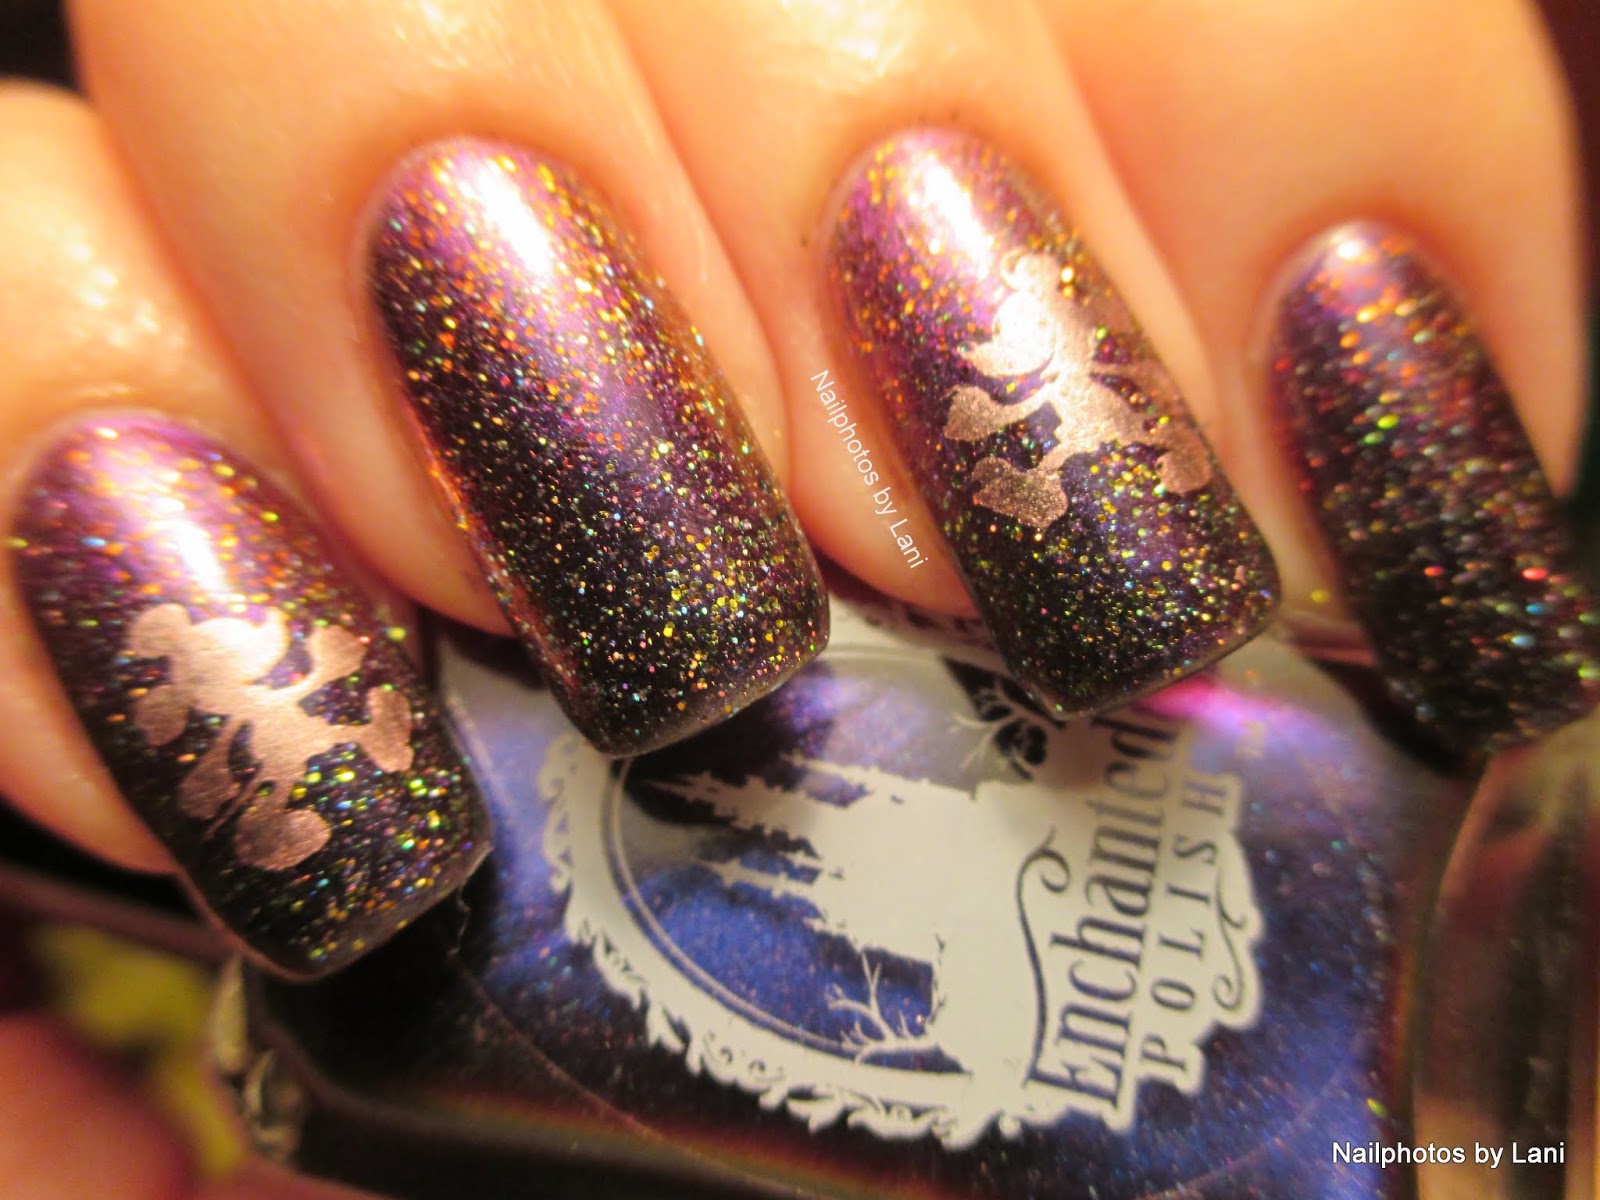
Enchanted Disney - GOT Polish Challenge: Indie


Hello everyone!


I used 3 polishes from Enchanted Polish. First a multichrome with holographic microglitter, and then I made a glitter gradient with 2 colorchanging glitters. I used Northern Lights as top coat before I stamped Mickey Mouse on. And the next day, I applied matte top coat.


Daylight:


Matte:


Products used:


Products used:

Nubar: Ridge Filler (base coat)
Enchanted Polish: Octopuse's Garden
Enchanted Polish: Ola Rio
Enchanted Polish: Hello New York
Out The Door: INM Northern Lights Hologram Top Coat "Silver"
Infinity Nails #31 (stamping plate)
China Glaze: Admire (stamping polish)
Seche Vite (top coat)
Gosh: Matte top coat


I bought these Enchanted Polish bottles when they were easy to get, about 1,5 years ago, and I haven't showed them on the blog  before. Octopuse's Garden is from the 2013 Imagine Collection. The two color changing glitters are from the Big City Lights Collection 2012. So they are not very old, but old enough for the GOT Challenge.


I made this in May when Disney was the Nail Polish Queens challenge. If I had seen the movie "Saving Mr. Banks" before I made this manicure, I think I would have added palm trees.


I hope you liked this nail art. Below you can find thumbnails with links to the other participants.

Lani


Thursday, April 17, 2014

My entry to Nail Polish Canada's Easter Nail Art Challenge


Hello everyone!


I was very happy when I was invited to participate in Nail Polish Canada's Easter Nail Art Challenge. This is my entry.


You can look at all the entries and vote for your favorite here.

You can find details about this manicure and more photos here.


I wish you all a happy Easter Holiday! And good luck if you are participating!

Lani

Sunday, December 1, 2013

Nail Polish Canada's 2013 HOLIDAY NAIL ART CHALLENGE WEEK 1 - SNOW


Hello everyone!


I was very surprised when Nail Polish Canada invited me to participate in their 2013 HOLIDAY NAIL ART CHALLENGE. It made me very happy! :-) I remember the beautiful manicures for last year's challenge, and and it's been very interesting to see what has been made so far this year. The challenge will run for three weeks (one mani per week). And we can participate one week or all three. The theme this first week is Snow, and we can make anything related to snow. This is my entry for week 1. As you hopefully can see, a snow fairy tried to make pink snow in her little Winter Wonderland on my nails. As usual, I have more photos of this manicure, and further down, you'll find a list of products, and I'll tell how I did this.

Although I can't win the prizes, (because I don't have a mailing address in Canada or the U.S.) you can vote for me. Just click here to vote for your favourite, or if you want to take a look at the other entries. If you want to join in, you can find all details and sign in here.


What I did:

1. I started with white nails. Then I made a pink- white gradient. I mixed pink and white nail polish on my palette (the back side of a stamping plate) with a dotting tool, and used a sponge.
2. For the layer of snow on the tips, I used the one stroke technique. I used pink and white acrylic craft paint for that, and a small angled brush. Usually I use fast drying top coat between layers, but this time I added a shimmer top coat first; one coat of IsaDora #769. (It shows IRL.)
3. Then I used different stamping plates, and a XL stamper for the fairy. For the snowflakes I used a Konad stamper most of the time, and white, pink and red Konad stamping polishes. And I made some dots from the fairy's wand.
4. The photos were taken inside. Because it was dark outside, I brought  a bag of snow to the kitchen, and made a little snow photo studio. I used an Ott- Lite, and held my hand in a shoe box with white sheets of paper inside. To not get everything wet, I placed a plastic bag under the snow. I've recently started taping pizza baking paper on the Ott- Lite, after seeing this photo tutorial on My Awesome Beauty. An Ott- Lite lamp is a good alternative, if you live in Canada or other places where there's little winter daylight.

After taking photos with Ott- lite yesterday, I had a chance to take photos in daylight this morning. The one taken in daylight is the first photo, and there you can see the shimmer better. But the gradient shows better on the other photos.


Products used:

IsaDora: #600 (base coat)
IsaDora: #603 Tip White
GOSH: #598 Bubble Gum (pink)
dotting tool
sponge
Acrylic craft paint: Titanium White (white), Rose (dark pink)
small angled brush
IsaDora: #769 Mother of Pearl
Seche Vite (fast drying top coat)
Konad stamping polish: Red, Psyche Pink, Pastel Pink, White
XL stamper
Konad stamper
lint roller (to remove polish from the stamper)
Stamping plates:
Fairy and snowflakes: MoYou London: Princess 07
Snowflakes:
MoYou London: Princess 02
MoYou London: Artist 04
HB-23
BM- 323
1 little bag of snow (for the photos)


I hope you liked these pink snow nails, and that you'll participate in this challenge too. I wonder what the next theme will be.

Lani