Showing posts with label Nail Polish Canada. Show all posts

Friday, August 8, 2014

My Entry for Nail Polish Canada's Summer 2014 Nail Art Challenge


Hello everyone!


I was invited to participate in Nail Polish Canada's Summer 2014 Nail Art Challenge. That made me very happy! :-) This is my entry. You can look at all the entries and vote for your favorite here.


Products used:

OPI: My Boyfriend Scales Walls
Butterfly nail stickers from Born Pretty Store
Snails Nail Art Pen: Truffles
Palette
Small round brush
Dance Legend Wow Prism: #35 Inhale
Dotting tools
Ellagee: Cadium Glass
Kleankolor Chunky Holo: #228 Candy, # 233 Teal, #230 Fuchsia
+ base coat and a lot of Seche Vite


I will write a separate blog post about how I did this and about these products. I'll link to it here when I've written it. But the short version is: 1. white nails 2. butterfly stickers 3. draw flowers 4. paint green background 5 LeadLight technique.

I was given the nail stickers for review, and Born Pretty Store wanted me to give you this 10% off discount coupon code: NPBL10K31, in case you want to buy something. But it looks like they have a 80% summer sale this weekend. :-)
Thank you Born Pretty Store! ♥

The Elagee polish and the nail art pen were bought from Norway Nails, and almost everything is 50% off there this weekend if you use this discount coupon code: ENDOFSUMMER.


♥ I hope you like this nail art! Have a nice weekend! Thank you Celine for inviting me! ♥


Lani

Sunday, December 8, 2013

Nail Polish Canada's 2013 HOLIDAY NAIL ART CHALLENGE WEEK 2 - DECORATIONS

Tinsel & Christmas Ornaments


Hello everyone!


My new e-mail from Nail Polish Canada explained that: "This week's nail art challenge is DECORATIONS. Lights, trees, tinsel whatever your favorite holiday decorations are." My favourite Christmas decoration is a palm tree decorated with lights, but that was too difficult for me, so I tried to make tinsel and Christmas ornaments.

To vote for your favourite, and look at all the entries, click here. If you want to participate, you can see details and still register here.


What I did:

I started with the dark green sparkly textured nail polish; IsaDora #112 Emerald Crush, that I bought in October. It's opaque in two coats. This is what it looks like on it's own:


For the tinsel I used a silver holographic bar/ string glitter; IsaDora #861 Shanghai, that I bought on Friday. I put a little on my palette, not to get too much clear polish, and applied the glitter with a brush, and later a doting tool. Then I sealed the stripe of glitter with the clear polish. For my Christmas nails, tinsel is enough, but for the competition, I added a little more.


For the Christmas ornaments, I tried to make 3D circular shapes. This was not easy, so I had to do some clean up. They were made with one layer of Seche Vite, one with silver nail polish (only in the beginning), multipurpose glue, and finally I used a Q- tip to apply the holographic nail foil. (I have written about how to apply nail foil here.)


Products used:

IsaDora: #600 Clear
IsaDora: #112 Emerald Crush
IsaDora: # 861 Shanghai
Palette (a stamping plate)
Brush
Dotting tool
Seche Vite
H&M: Metallic Grey
Q- tip
N.NAIL Shiny Silver Nail Foil Transfer [NNAIL-E24] and glue -used here and here (10% KKCenterHk coupon code: Nailphotos by Lani)


If you want to participate, look at the other nail art entries, or vote for your favourite, use the links above.

I hope you are all doing well. I'm especially thinking about everyone affected by the wind/ hurricane in Europe. Have a nice weekend! :-)

Lani

Sunday, December 1, 2013

Nail Polish Canada's 2013 HOLIDAY NAIL ART CHALLENGE WEEK 1 - SNOW


Hello everyone!


I was very surprised when Nail Polish Canada invited me to participate in their 2013 HOLIDAY NAIL ART CHALLENGE. It made me very happy! :-) I remember the beautiful manicures for last year's challenge, and and it's been very interesting to see what has been made so far this year. The challenge will run for three weeks (one mani per week). And we can participate one week or all three. The theme this first week is 
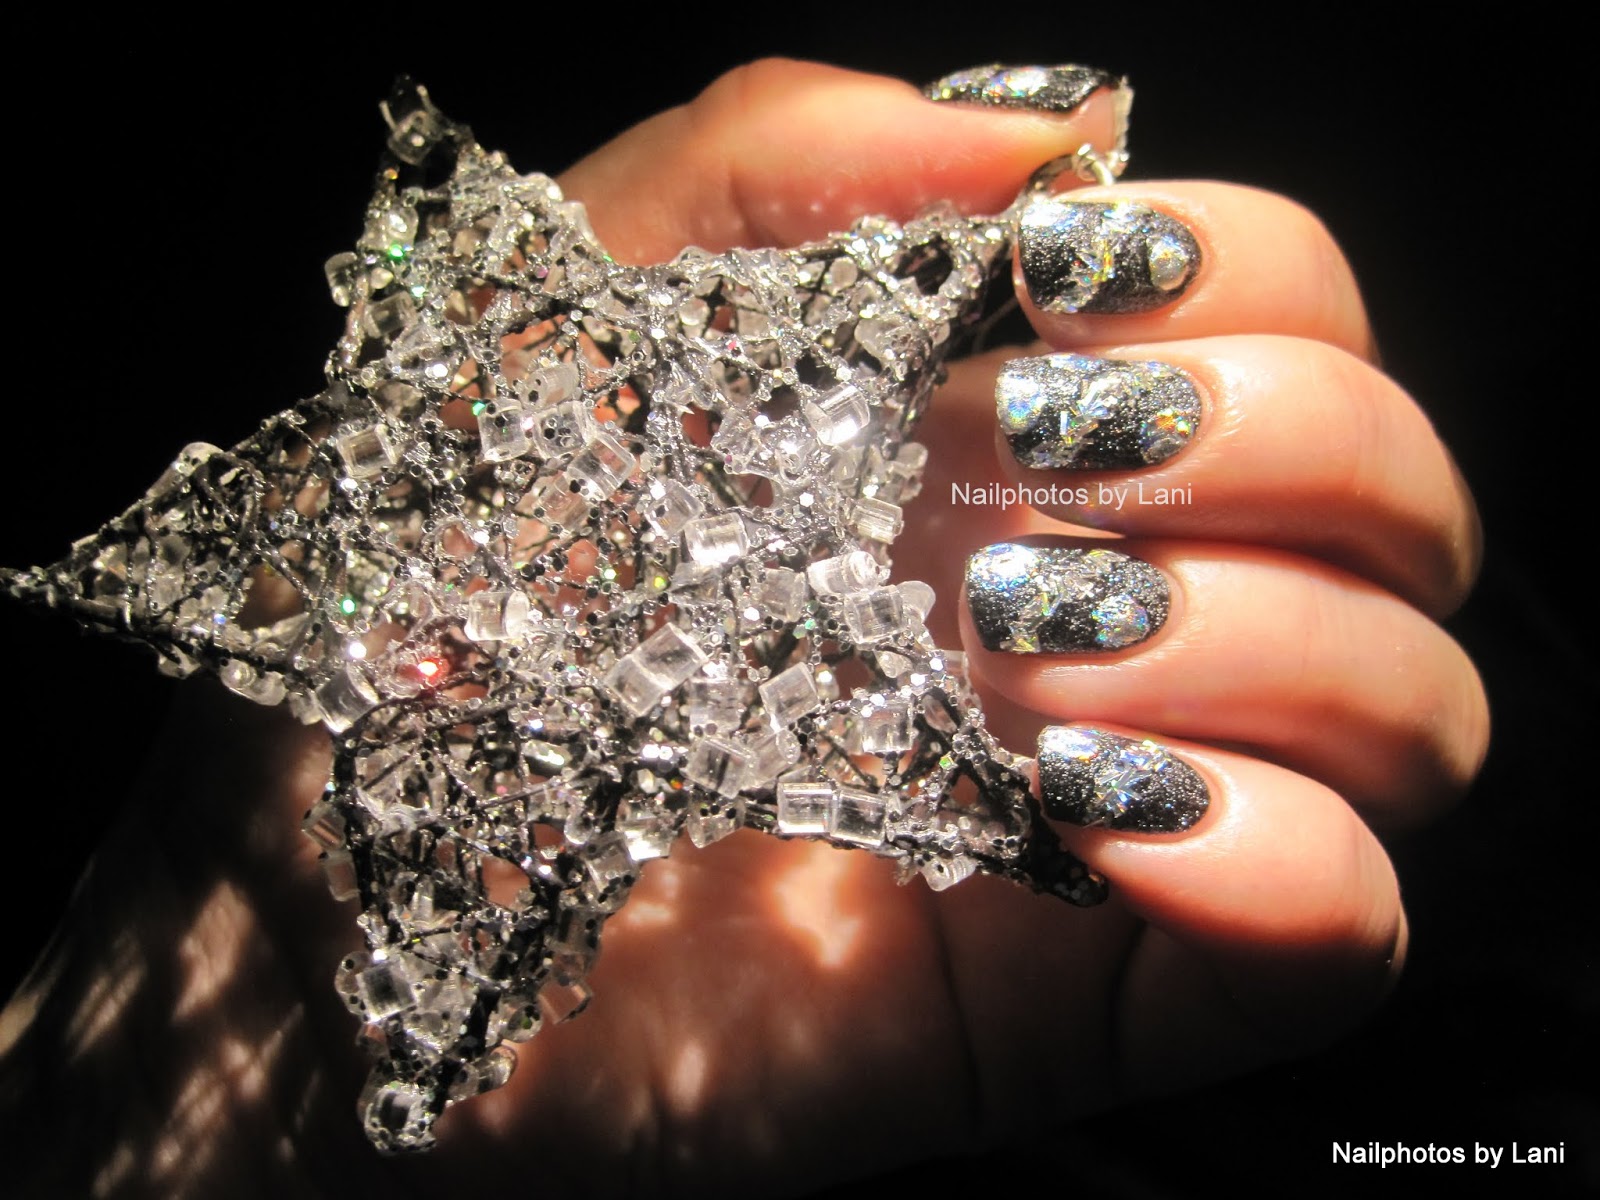
Snow, and we can make anything related to snow. This is my entry for week 1. As you hopefully can see, a snow fairy tried to make pink snow in her little Winter Wonderland on my nails. As usual, I have more photos of this manicure, and further down, you'll find a list of products, and I'll tell how I did this.

Although I can't win the prizes, (because I don't have a mailing address in Canada or the U.S.) you can vote for me. Just click here to vote for your favourite, or if you want to take a look at the other entries. If you want to join in, you can find all details and sign in here.


What I did:

1. I started with white nails. Then I made a pink- white gradient. I mixed pink and white nail polish on my palette (the back side of a stamping plate) with a dotting tool, and used a sponge.
2. For the layer of snow on the tips, I used the one stroke technique. I used pink and white acrylic craft paint for that, and a small angled brush. Usually I use fast drying top coat between layers, but this time I added a shimmer top coat first; one coat of IsaDora #769. (It shows IRL.)
3. Then I used different stamping plates, and a XL stamper for the fairy. For the snowflakes I used a Konad stamper most of the time, and white, pink and red Konad stamping polishes. And I made some dots from the fairy's wand.
4. The photos were taken inside. Because it was dark outside, I brought  a bag of snow to the kitchen, and made a little snow photo studio. I used an Ott- Lite, and held my hand in a shoe box with white sheets of paper inside. To not get everything wet, I placed a plastic bag under the snow. I've recently started taping pizza baking paper on the Ott- Lite, after seeing this photo tutorial on My Awesome Beauty. An Ott- Lite lamp is a good alternative, if you live in Canada or other places where there's little winter daylight.

After taking photos with Ott- lite yesterday, I had a chance to take photos in daylight this morning. The one taken in daylight is the first photo, and there you can see the shimmer better. But the gradient shows better on the other photos.


Products used:

IsaDora: #600 (base coat)
IsaDora: #603 Tip White
GOSH: #598 Bubble Gum (pink)
dotting tool
sponge
Acrylic craft paint: Titanium White (white), Rose (dark pink)
small angled brush
IsaDora: #769 Mother of Pearl
Seche Vite (fast drying top coat)
Konad stamping polish: Red, Psyche Pink, Pastel Pink, White
XL stamper
Konad stamper
lint roller (to remove polish from the stamper)
Stamping plates:
Fairy and snowflakes: MoYou London: Princess 07
Snowflakes:
MoYou London: Princess 02
MoYou London: Artist 04
HB-23
BM- 323
1 little bag of snow (for the photos)


I hope you liked these pink snow nails, and that you'll participate in this challenge too. I wonder what the next theme will be.

Lani