Showing posts with label freehand nail art. Show all posts

Sunday, October 26, 2014

52 Week PICK N MIX Challenge - Grey & colour - freehand nail art


Hello everyone!


This was made just a few hours before the deadline. I started with grey nails, and made a grey - pink gradient with grey, white and pink nail polish. The flowers were painted with acrylic craft paint, one angled brush and one round brush. I had just seen this tutorial, so although my nail art doesn't look like that, Cutenails/ Tartofraises is the one who inspired me. And this nail art made by ALPS Nail Art, so that's why I used these colors.


Products used:

Duri Rejuvacote
Inglot: #671
OPI: My Boyfriend Scales Walls
GOSH: #598 Bubble Gum
Sponge
Angled brush
Round brush
Acrylic craft paint from Panduro:
Rose
Titanium White
Lamp Black
Seche Vite


Inglot: 671

I used 2 coats of Inglot: 671, but I would have used 3 if I wasn't going to make a gradient. The lovely purple shimmer that I see in the bottle doesn't show on the nail, but I think it's a pretty grey color.

Inglot is not tested on animals, and it's as close to being vegan as possible; The kind man in the Inglot store explained that they use products like bee wax, and real hair in some of the brushes they sell, but that they also have animal free alternatives. So although no animals are killed to make Inglot products, they are not vegan, if I understood it correctly. :-)


Lani


Friday, August 8, 2014

My Entry for Nail Polish Canada's Summer 2014 Nail Art Challenge


Hello everyone!


I was invited to participate in Nail Polish Canada's Summer 2014 Nail Art Challenge. That made me very happy! :-) This is my entry. You can look at all the entries and vote for your favorite here.


Products used:

OPI: My Boyfriend Scales Walls
Butterfly nail stickers from Born Pretty Store
Snails Nail Art Pen: Truffles
Palette
Small round brush
Dance Legend Wow Prism: #35 Inhale
Dotting tools
Ellagee: Cadium Glass
Kleankolor Chunky Holo: #228 Candy, # 233 Teal, #230 Fuchsia
+ base coat and a lot of Seche Vite


I will write a separate blog post about how I did this and about these products. I'll link to it here when I've written it. But the short version is: 1. white nails 2. butterfly stickers 3. draw flowers 4. paint green background 5 LeadLight technique.

I was given the nail stickers for review, and Born Pretty Store wanted me to give you this 10% off discount coupon code: NPBL10K31, in case you want to buy something. But it looks like they have a 80% summer sale this weekend. :-)
Thank you Born Pretty Store! ♥

The Elagee polish and the nail art pen were bought from Norway Nails, and almost everything is 50% off there this weekend if you use this discount coupon code: ENDOFSUMMER.


♥ I hope you like this nail art! Have a nice weekend! Thank you Celine for inviting me! ♥


Lani

Wednesday, January 9, 2013

Something New -Polish Days January


PAINTED & MAGNETIZED


Hello everyone!
(This blog seems to look best in Google Chrome)
Painted & Magnetized


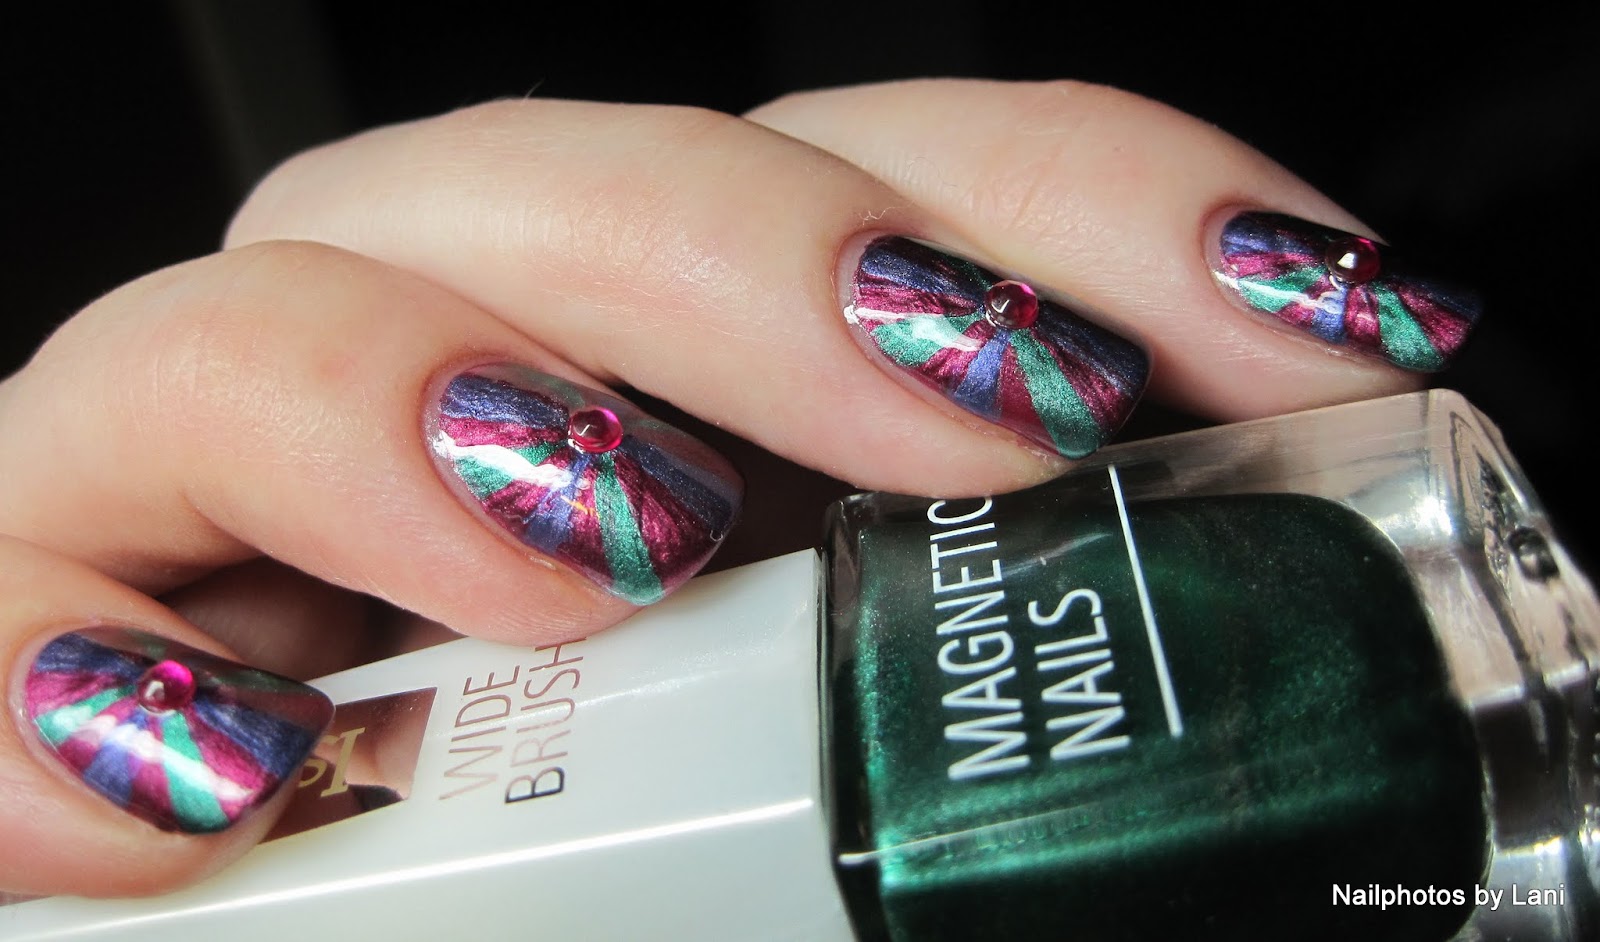
For Polish Days January we are all going to make something new. I have used this technique once before, but this is the first time I use the same pattern on all nails. And this time I use red/ magenta, green and blue/ blurple, and added rhine stones. The pattern is created by first painting a pattern using magnetic nail polishes, and then make a second pattern with the magnet after applying top coat.

Painted & Magnetized


For information about Polish Days, and how you can join in, just click on the badge below, and you will find everything you need, explained by Hannah from Polly Polish. She is the one who started Polish Days and she organizes it.


More photos:

Painted & Magnetized

Painted & Magnetized

Painted & Magnetized
 
Painted & Magnetized

Painted & Magnetized


Painted & Magnetized

Painted & Magnetized

Painted & Magnetized

Painted & Magnetized


I wasn't good at placing the magnet this time. I wish the inner circles were placed in the middle, where the stripes met. I also wish I had managed to make a more smooth surface.

Used:

Tiny brush
Palette
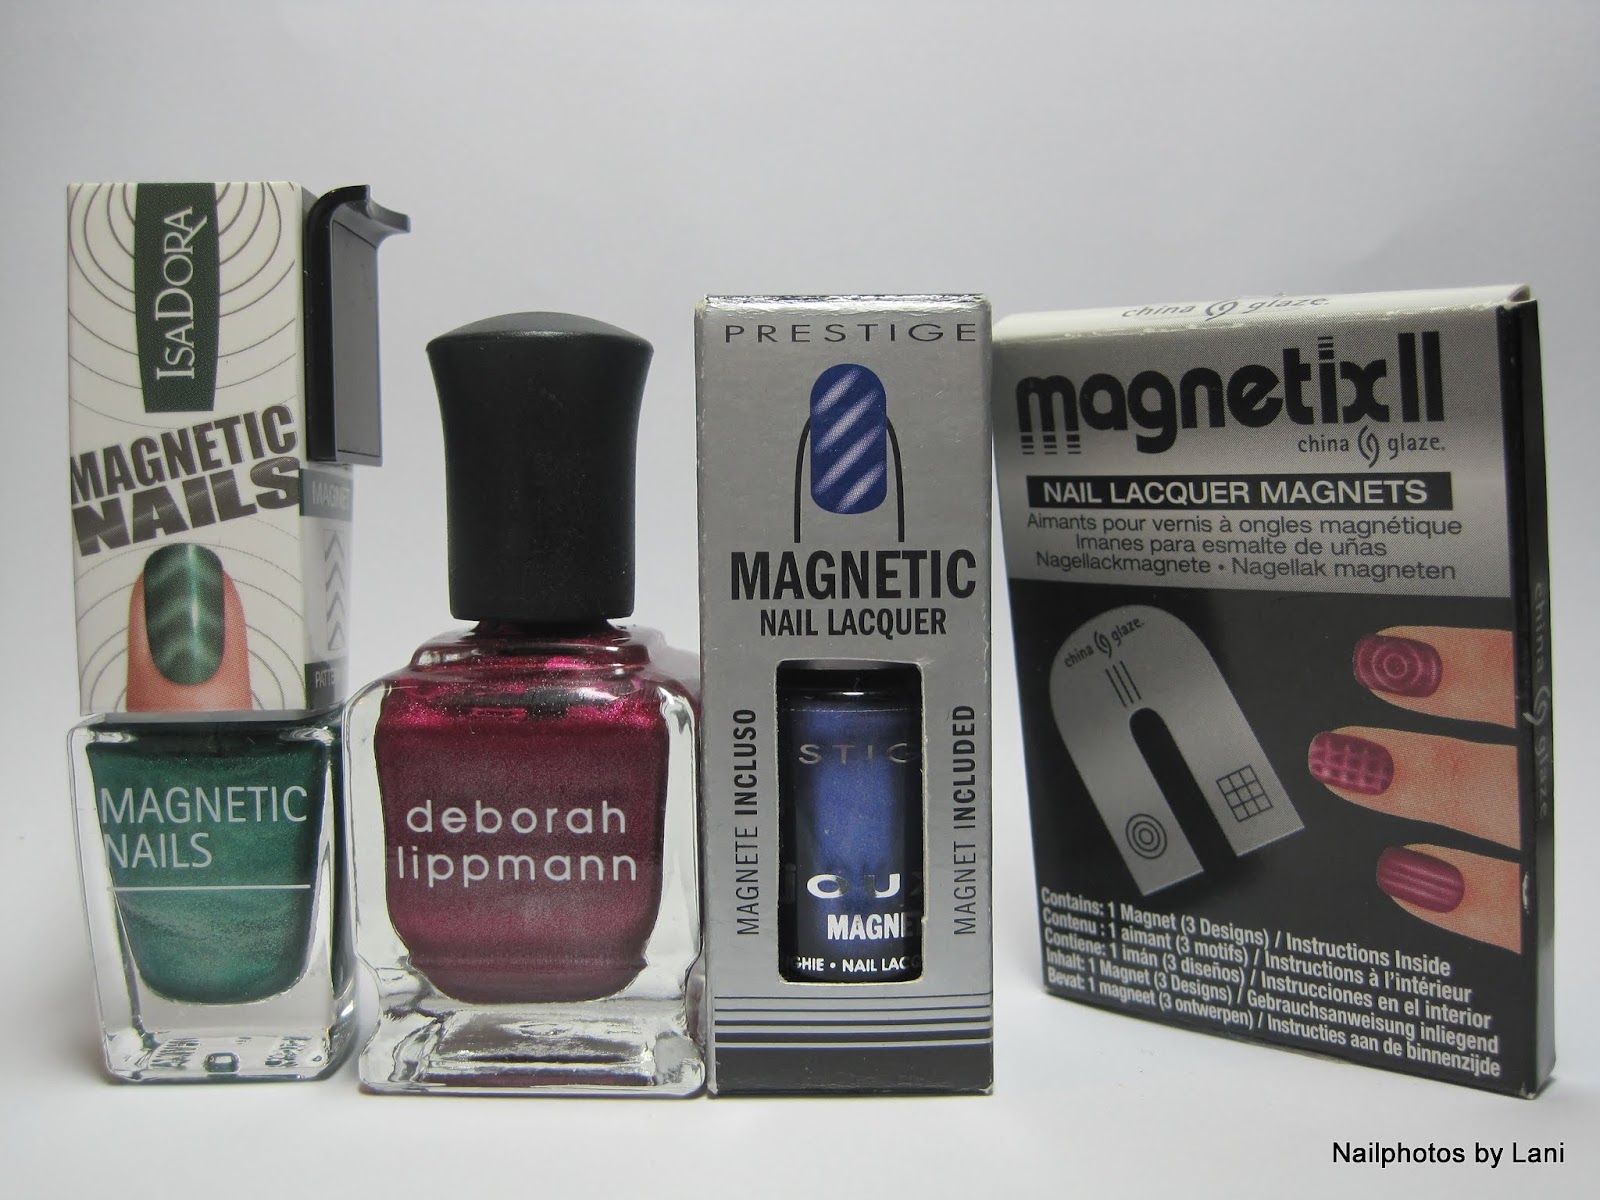
Magnet: China Glaze Magnetix II
Base- and top coat
Magnetic nail polish:
Deborah Lippmann Magnetic Wave: Love is A Battlefield (magenta)
IsaDora Magnetic Nails: 854 Opposites Attract (green)
Prestige: NMM-03 Topaz (blue/ blurple)
Rhine stones (fuchsia)

IsaDora Magnetic Nails 854 Opposites Attract, Deborah Lippman Magnetic Wave Love is A Battlefield, Prestige NMM- 03 Topaz, China Glaze Magnetix II magnet, Used for my Painted & Magnetized mani

China Glaze Magnetix II magnet, bulls eye pattern, Used for my Painted & Magnetized mani

Dotting tool, fuchsia rhine stones, Bundle Monster nail art wheel, Used for my Painted & Magnetized mani


The rhine stones are from one of the 5 nail art wheels I chose when I won a Chit Chat Nails Bundle Monster contest! :-) Link: Nailart Nail Art Glitters Beads Rhinestones Wheel from Bundle Monster. The other thing I chose was the 2012 stamping plates.

Painted & Magnetized, Bundle Monster nail art wheel


Below, you can find thumbnails with links to all the participants' posts.

Lani

Saturday, December 1, 2012

Sat- ART- Day Club: One stroke mani


Hello everyone!

One stroke mani


This is my first one stroke mani. I have seen tons of tutorials on YouTube, and have wanted to try this technique for a long time. But I needed the Sat- ART- Day Club to get me started. So this is what I made for last weeks Sat- ART- Day Club, when the challenge was to make a the one stroke mani. I'm sorry that I haven't written this blog post earlier. Actually, I had hoped to make many more posts in November, but things don't always go as planned.

I especially have to thank Cutenails/ Tartofraises and Marjorie Harris for teaching me the one stroke technique. I'll include two of their videos for you at the end of the post. This mani is especially inspired by Cutenails, although it's my own design.

Sunday, October 28, 2012

Sat- ART- Day Club: Hallowe'en


Hello everyone!


This is the first time I'm participating in a Sat- ART- Day Club Challenge. We get one theme every Saturday. For Hallowe'en I made this skittles mani, with a smiling ghost, a black cat glitter french, a mummy, dripping blood, and stripes of blood. You can see all the other participants Hallowe'en manicures at the bottom of the post.