Showing posts with label Yellow. Show all posts

Sunday, November 16, 2014

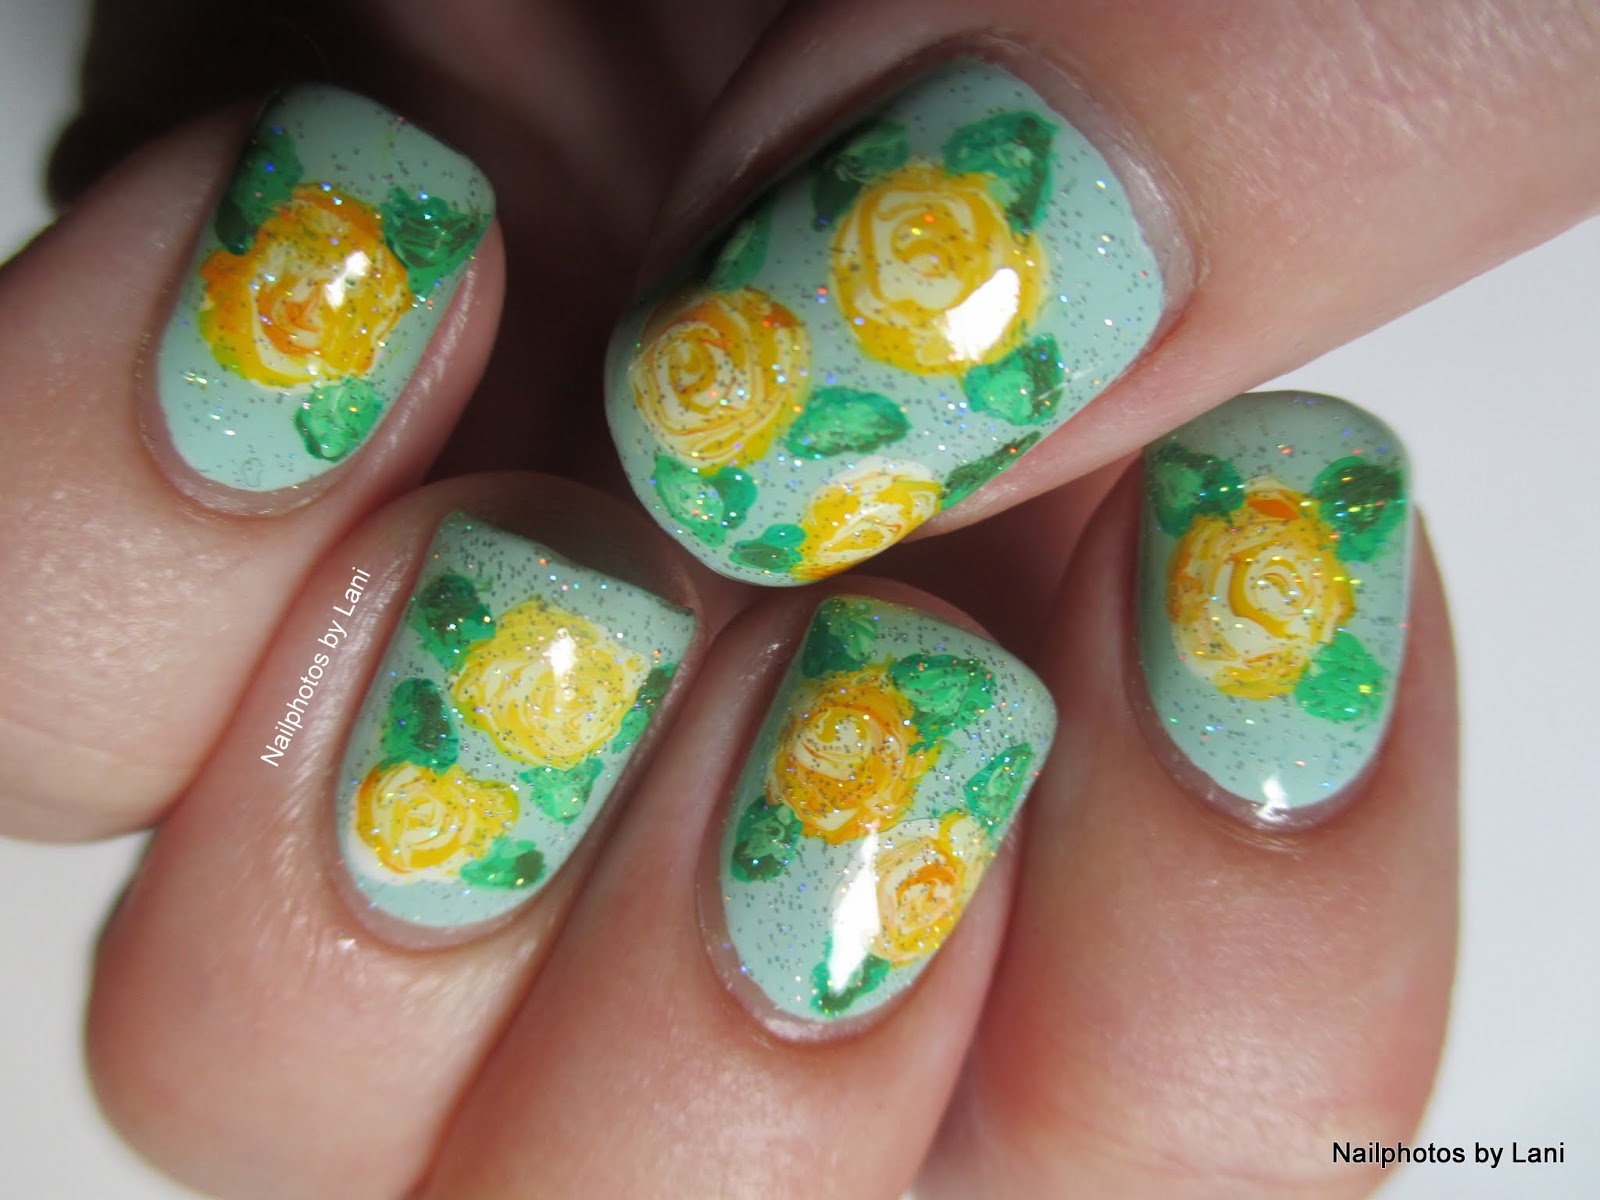
#52WPNMC - Yellow Roses - freehand nail art - BB's Autumn Challenge


Hello everyone!


"Yellow" is one of the themes in the 52 Week PICK N MIX Challenge this week, but I made this when "yellow" was the theme in the Blogger Bragger Autumn Nail Art Challenge. The base is Deborah Lippmann: Flowers In Her Hair, and the yellow roses and the leafs are painted with acrylic craft paint and a toothpick. Some photos are taken before I added INM Northern Lights, and some are with the holo microglitter. So this is a mint and yellow version of my Vintage Flowers nails.

One photo of how I made this:

The finished nail art:


I've used this polish before, for my LIVE ♥ laugh ♥ love nails.

Thank you for visiting my blog!


Lani

Sunday, May 11, 2014

LIVE ♥ laugh ♥ love - fanbrush stripes & stamping nail art - pastels from Deborah Lippmann's "Spring Reveries" Collection - Valentine's Day nails #10


Hello everyone!

Stage 4


I started with pastel mint green nails. Then I used a fan brush to make stripes in pastels (yellow, lime green, blue and lavender). I used all the nail polishes from Deborah Lippmann's 2014 limited edition "Spring Reveries" Collection, except for the pastel orange. Instead I used Ruby Kisses: Lavender Dream, that I've showed you earlier.

I stamped with China Glaze: Adore, BM- 405 (text) and BM- H16 (flowers).
BM-405 is from Bundle Monster's 2013 "Create Your Own" Collection, and BM-H16 is from the 2013 Holiday Collection. But now it's possible to buy individual plates too.
Adore is from China Glaze's Romantique Collection from Spring 2009. Shades from that collecion are Messy Mansion's favorites for stamping, so I wanted to try it. I found this teal on eBay, and it worked very well for stamping.

This manicure kind of evolved, so there are different versions of it below.

Here you see the palette. I've fallen in love with these pastels. You'll find their names in the product list. I was very pleased with the result you see below,

Stage 1

but sadly I had to redo the ring finger nail, so this is what it looked like before the stamping:

Stage 2

More photos of the "LIVE ♥ laugh ♥ love & 4 flowers" version:

Stage 4

Stage 4

I made this manicure for a AIS Sunday challenge in March, when I was very happy to see these spring flowers.

Stage 3


This version is with only two flowers.

Stage 3


Then I accidentally removed too much when I tried to use tape to do the clean up. So I applied the DL shimmer (La Vie En Rose) from the same collection on some of the nails. And then I filled in the flowers with the shimmer, but it didn't look good, so I took the flowers off. (No pictures of stage 5)

The last version is with the text on all nails and shimmer on all nails except the middle finger nail:

Stage 6

Stage 6


Products used:

Deborah Lippmann: Flowers In Her Hair (pastel mint green creme)
Deborah Lippmann: Build Me Up Buttercup (pastel yellow creme)
Deborah Lippmann: Spring Buds (pastel lime green creme)
Deborah Lippmann: Blue Orchid (pastel blue creme)
Deborah Lippmann: La Vie En Rose (sheer nude/ pastel pink with copper shimmer)

-all from Deborah Lippmann's "Spring Reveries" Collection from spring 2014

Ruby Kisses: Lavender Dream (lavender creme)

A fan brush
Palette (the back side of a Messy Mansion plate) 
XL stamper (black with white soft and small red hard stamper)
Stamping polish: China Glaze: Adore (teal metallic)
Stamping plates: BM- 405 (LIVE ♥ laugh ♥ love) and BM- H16 (flowers)
Lint roller to clean the stamper
Scotch tape to remove my mistakes/ for clean up, (which minimised the need for clean up with a brush dipped in acetone)

Duri Rejuvacote as base coat and Seche Vite top coat.


As I've mentioned before Deborah Lippmann products are not tested on animals.

Stage 6

I haven't swatched the Spring Reveries Collection, but I've used Blue Orchid for nail art. Just click here to see it.


Lani

Wednesday, April 2, 2014

GOT Polish Challenge: YELLOW/ PEACH


Hello everyone!


Helena Rubinstein: 'Lemon Heat' was one of the old bottles of polish that I looked forward to use when I first heard about the GOT Challenge. I don't remember when I bought it, but I think it can be considered vintage. Do you know how old it is? Maybe 15 years? Still no need for thinner.


You can find Lemon Heat swatched here, and my tiny vintage collection here.


For the stamping I used Konad: SN Yellow, and flowers from two Moyou London stamping plates: 08 (small) and 10 (XL), both from the Pro Collection. (I couldn't find 08 now that I wanted to link to it.)


The first photos below are of a shiny Lemon Heat with stamping, the next are with top coat (Seche Vite), and the rest are mattified (with GOSH #600 'Matt Effect Top Coat').

Saturday, August 31, 2013

Yellow Zebra Nails- Stamp over a Saran wrap method base


Hello everyone!


Ever since I saw a picture of a yellow zebra called Zoe, I've wanted to make yellow zebra nails. The challenge in Adventures In Stamping, about a month ago, was "Stamping over a Saran wrap method base". So the base is the pastel yellow and gold saran wrap mani I showed you in the latest blog post. And I stamped with Konad White and these four stamping plates:


Stamping plates used:

a) Cheeky Jumbo Plate 9 "Wild at Heart"- zebra face with left eye
b) A Chinese plate (Sorry, but I don't know how to write the letters) The seller calls it "QA Series 2012 Anniversary Edition" -zebra face with right eye
c) Pueen 10 from the Sumptuous Gallery set- thick stripes
d) Konad m 57- bending stripes

And here are the nail polish bottles:


Nail polish used:

H&M: Want a lemon - yellow
H&M: Run Baby Run - gold
Konad: White - white stamping polish


The photo I saw of Zoe shows a zebra with blue eyes, and yellow stripes instead of black stripes. But the color looks more orange than the color on my nails. Now I've seen other photos of her where the color of the stripes look more like a golden retriever's. Zoe is not an albino, but has a disorder called amelanosis. Because zebras with this coloring look different from their herd, they are in danger when they live in the wild. Zoe is kept in an animal sanctuary in Hawaii.


I liked the yellow zebra nails very much, and they matched one of my T- shirts. But the gold doesn't show well, so next time I stamp over a saran wrap base, I think I'll choose colors that are more different.


Lani

Thursday, August 8, 2013

Yellow and gold saran wrap louboutin nails


Hello everyone!


I started with pastel yellow, and used a small brush to paint the underside of my nails with a gold nail polish. Then I used the saran wrap technique to add a little gold nail polish over the yellow base, and added a coat of Seche Vite. This was supposed to be the base for my "Baby Prince Nails", so that's why I made louboutin nails. But I tested the baby blue stamping on the other hand, and it didn't turn out so well... I liked it like this, though.


Yes, I turned the photo. Yes I noticed the water in the bottle, but I like the picture better like this :-)


Saran wrap method:

I've had the saran wrap method on my "to do list" ever since I first saw a Saran nails tutorial on the blog Nailed It. (I hope I'm not hurting anyone's feelings by linking to her. I saw in the comments on that page that a similar tutorial had been made prior to that, but the link didn't work, so I don't know who to credit.) After that, I have seen saran wrap used in different ways; either by adding color, or by removing the second color, using wrinkly plastic wrap (also called saran wrap) as a tool.

This is how I did it:

I started with dry yellow nails, put some gold nail polish on my palette, dipped the saran wrap in the gold, dabbed on the palette until the saran wrap had the desired amount of gold polish, and dabbed on the nail.


Saran/ plastic wrap:


Nail polish used:

H&M: Want a lemon - yellow
H&M: Run Baby Run - gold


This was a very quick way of dressing up a manicure, and it makes me sad that I waited so long before I tried it. The reason why I did it now, was a A.I.S. challenge: "stamping over a saran wrap method base". I'll show you in the next post.

Lani

Wednesday, August 7, 2013

H&M Want a lemon + new wide H&M brush


Hello everyone!


This is the first time I'm showing you a pastel yellow creme nail polish. For some reason I thought my skin was too pale for colors like this. But after seeing many beautiful yellows on Marias Nail Art and Polish Blog, I wanted to try one. I love the color. It's H&M Want a lemon. And as I always like to mention Hennes & Mauritz (H&M) do not test on animals, and can be found on the animal organizations' cruelty- free lists :-)


The first coat was streaky, but as I got used to the new wide brush, it was easier and easier to apply the polish. This is 3 coats and one coat of Seche Vite.

Here you can see the old and the new brush:

Left: Old H&M brush. Right: New H&M brush


I bought this polish a few weeks ago, and was surprised that they had changed the brush. It looks like the bottles with the new brush have a narrow cap, and come in a little plastic box. The old bottles have a cap in the same size as the bottle, and come in a plastic bag.

H&M Want a lemon


I also bought the gorgeous IKB blue called Serenity now, and a kind of pastel grey- green called Chill out. They also have the wide brush.

H&M Want a lemon


This yellow was the base for the yellow zebra saran wrap mani that you might have seen on A.I.S. one and a half week ago. Hopefully I'll show it here on the blog too, soon.


Lani