Hello everyone!
(If the photos appear to be too far to the right, please use Google Chrome!)
 |
| Black butterfly nails, N.NAIL- DRN276, from KKCenterHk |
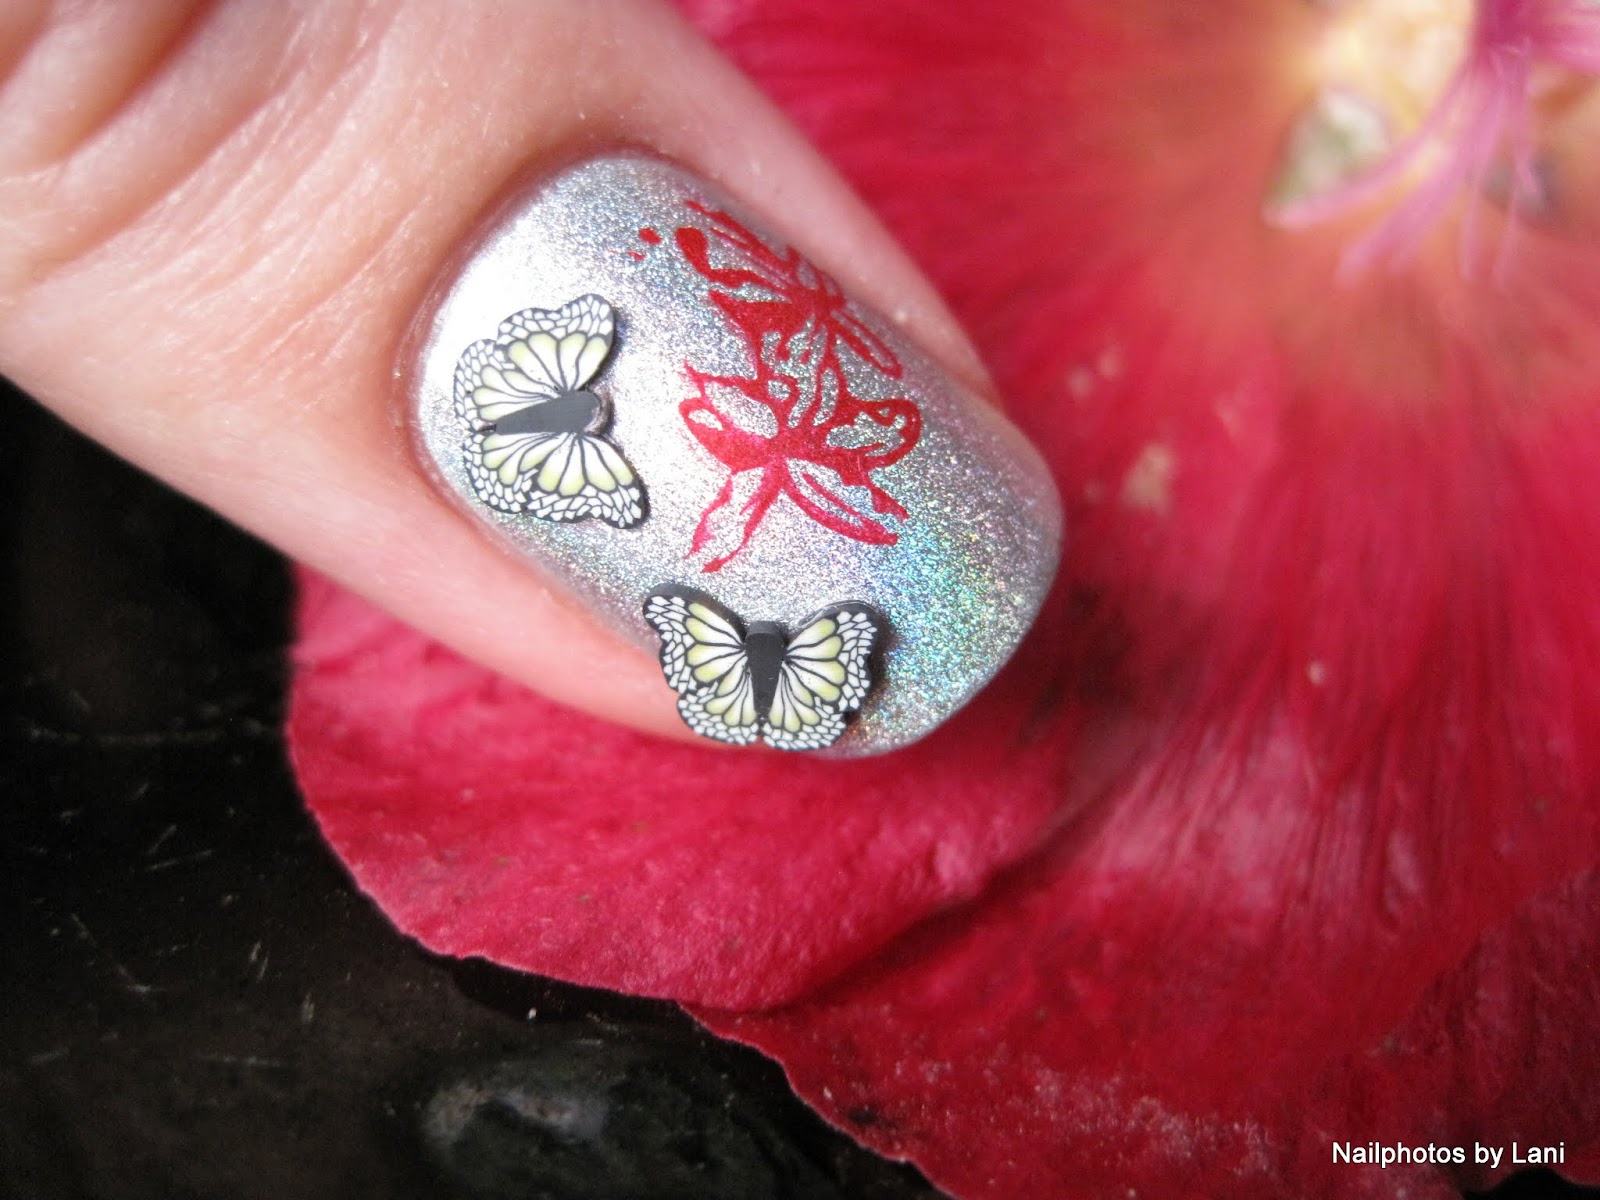
This is what I made with my black butterfly modelling clay from KKCenterHk. As you see, I also stamped 3 flowers on my ring finger. And among the photos below, you will see a flower on my thumb too. As a base color for this nail art, I used Gosh #549 Holographic Hero.
 |
| Black butterfly nails, N.NAIL- DRN276, from KKCenterHk |
 |
| Black butterfly nails, N.NAIL- DRN276, from KKCenterHk |
 |
| Black butterfly nails, N.NAIL- DRN276, from KKCenterHk |
 |
| Black butterfly nails, N.NAIL- DRN276, from KKCenterHk |
 |
| Black butterfly nails, N.NAIL- DRN276, from KKCenterHk |
I was so eager to place the butterflies, that I had already done that on the other nails... It was very quick and easy. But let's go back in time, and start at the beginning.
(For more photos, scroll down!)
 |
| Black butterfly nails, N.NAIL- DRN276, from KKCenterHk |
 |
| Black butterfly nails, N.NAIL- DRN276, from KKCenterHk |
And soon, you will see that you have enough for more than one manicure.
 |
| Black butterfly nails, N.NAIL- DRN276, from KKCenterHk |
 |
| Black butterfly nails, N.NAIL- DRN276, from KKCenterHk |
Now that the butterflies are ready to use, you can sort them if you want. Because this was my first time to use this kind of clay, I choose to do the cutting some days before I made the nail art. Therefor I sorted the little butterflies, so that I packed the thinnest and most even slices in aluminium foil, and put everything back in the plastic bag. It's nice to have that bag for storage.
Then, when I had time for nail art, I had painted my nails the day before, and I could just get the three little bags I needed; the stamping plate, the aluminum packet, and the stamper and scraper, and a few more things:
 |
| Black butterfly nails, N.NAIL- DRN276 and SPPMB26 and stamper and scraper, from KKCenterHk |
stamping plate with flower images- I used N.NAIL SPPMB26 from KKCenterHk
stamper and scraper- (gift from KKCenterHk)
red stamping polish
pink stamping polish (I used a pink regular polish that had become too thick)
yellow sheer nail polish (for the center of the flowers, and used a sheer polish not to cover the image)
nail polish remover, cotton swabs (to clean the stamping equipment)
This is what you need to place the black butterflies:
base coat (to use as glue)
dotting tool (to pick up and place the butterflies)
tweezers (to press down after placing each butterfly)
thin slices of black butterfly modeling clay- I used N.Nail Black Butterfly Modelling Clay Nail Decorations (N.NAIL- DRN276) from KKCenterHk
top coat (will help as glue)
 |
| Black butterfly nails, N.NAIL- DRN276, from KKCenterHk |
 |
| Black butterfly nails, N.NAIL- DRN276, from KKCenterHk |
How to place the butterflies:
What I did first was to put the butterflies where I wanted them, and move them around to see what would look beautiful.
*Just use the brush to put a little base coat where you want one butterfly to be.
*Dip the end of the dotting tool in the wet pool of base coat, touch a butterfly, and it will stick to the dotting tool so that you can put it on the right spot. You have time to move it a little if you need to do that.
*Use the tips of the tweezers to press on both sides of the butterfly until the glue/ base coat dries. (I learned to use the tweezers like this from a tutorial by Cutenails. You can use your finger instead of tweezers, but it's easy to get wet polish on it.)
*After you have done that with all the butterflies, seal everything with top coat. If not, the butterflies will begin to loosen after a few hours. In that case, just put base coat under the edge, and press down again, and seal with top coat.
 |
| Black butterfly nails, N.NAIL- DRN276, from KKCenterHk |
 |
| Black butterfly nails, N.NAIL- DRN276, from KKCenterHk |
I was afraid of getting bubbles and to smear my stamped image, and have therefor also taken photos before applying top coat. I decided to use some of the first photos too, so some pictures are with and some are without top coat.
 |
| Black butterfly nails, N.NAIL- DRN276, from KKCenterHk |
 |
| Black butterfly nails, N.NAIL- DRN276, from KKCenterHk |
 |
| Black butterfly nails, N.NAIL- DRN276, from KKCenterHk |
 |
| Black butterfly nails, N.NAIL- DRN276, from KKCenterHk |
 |
| Black butterfly nails, N.NAIL- DRN276, from KKCenterHk |
 |
| Black butterfly nails, N.NAIL- DRN276, from KKCenterHk |
How to remove the butterflies:
When I had used nail polish remover, the butterflies stayed on the nail:
 |
| Black butterfly nails, taking off N.NAIL- DRN276, from KKCenterHk |
But they came off immediately when I used my nail to bend them off:
 |
| Black butterfly nails, how to remove N.NAIL- DRN276, from KKCenterHk |
I was surprised that only one got ruined and that they still felt soft. But I don't know if they can be used several times.
 |
| Black butterfly nails, used butterflies N.NAIL- DRN276, from KKCenterHk |
More photos of the finished manicure:
 |
| Black butterfly nails, N.NAIL- DRN276, from KKCenterHk |
 |
| Black butterfly nails, N.NAIL- DRN276, from KKCenterHk |
 |
| Black butterfly nails, N.NAIL- DRN276, from KKCenterHk |
 |
| Black butterfly nails, N.NAIL- DRN276, from KKCenterHk |
If you want to buy something from KKCenterHk, you can use my coupon code and get 10 % off.
Coupon code: Nailphotos by Lani
The code ends: 31st, January, 1213
To go to KKCenterHk's web shop, just click on their banner below:

I was surprised by how quick and easy it is to change a manicure using this kind of modelling clay. I love my little black butterflies, so I'm glad I have many left.
Lani
These are gorgeous, I love the little fimo butterfly slices!
ReplyDeleteMe too! It's strange that they can make them so small and beautiful.
Deletegorgeous pics, those butterflies looks pretty nice :D
ReplyDeleteThank you! It was fun to take them, and fun to try something new.
DeleteThis manicure is so nice! :)
ReplyDeleteVery pretty!
ReplyDeleteI love these! Very pretty!
ReplyDeleteThank you! I'm glad you liked them!
Delete