Wednesday, March 27, 2013

The Tri- Polish Challenge: Day 3, Holographic Glitter & White Flowers


Hello everyone!


This manicure was inspired by the purple and white stamped nails in this Vintage nail art made by A Lacquered Affair. I had the same stamping image, and the silver version of the holographic glitter that she used, but other than that I used other polishes. So this looks different from her nail art, but I got the idea from it.


What I used:

As you see, I used purple, and green on the accent nail. So I used only two of the Tri- Polish colors today. I made a gradient on the tips with H&M 'Jo Is In The House'. The other polishes were applied on the entire nail. I took photos after each stage, but now I'm just showing the end result. The list is written in the order the polishes were applied.

Base coat
Linda Johansen Nail Candy: Lilac Lilly
H&M: Mint Madness
H&M: Pink bling bling
H&M:  Jo Is In The House- used here, here, and here
Konad SP: white
Stamping plate: BM- 312
IsaDora: #769 Mother of Pearl
INM OutTheDoor: Northern Lights Hologram Top Coat "Silver"- used many times
Top coat- between some of the layers & on top.


Here you see the IsaDora shimmer better:


This was supposed to be posted on Day 4. First I tried to make a skittlette. Then I tried to paint roses. And when I failed, I covered the roses with purple, and stamped roses over them, but the stems looked bad... I don't know why I think everything is easy before I start. So now I'm trying to find out what to make for Thursday. Something with silver or something black? And now the index finger nail broke again... and the ring finger nail on the other hand broke yesterday...


And below you will find the other manis for Day 3!

Lani

Monday, March 25, 2013

mi- ny: #244 I LOVE HONG KONG+ layering


Hello everyone!


Today I want to show you one more nail polish from mi- ny: #244 I LOVE HONG KONG (ILHK). It's a green polish with lots of bar/string glitter. I will show you the polish on it's own (on my left hand), and layered over five polishes (on the right hand).

mi- ny: I love Hong Kong


2 coats looked sufficient, but when I looked at the photos, I saw that I needed 3 coats. And as you will see when I try to layer ILHK, it's pretty opaque. In the bottle the glitter looks silver, but on the nail the bar/string glitter looks silver light green and holographic. On the first photo and the next one, I've used 2 coats. The rest are with 3 coats.

mi- ny: I love Hong Kong -2 coats


As many of my nail polishes ILHK is unique in my (not very big) collection, but this time I think I haven't seen any polish like it. From the photos I've seen, the base color of ILHK is not as bright as Toshop 'Hat Trick', and not as dark as Shaka 'Nature', but those are not string glitters.

mi- ny: I love Hong Kong

mi- ny: I love Hong Kong

mi- ny: I love Hong Kong

mi- ny: I love Hong Kong


Layering:

Here you see the colors I chose to layer ILHK over:

Ready for layering


And here you see the result with 1 coat of ILHK:

1 coat of mi- ny: 'I love Hong Kong'-  layered over 5 green polishes
It totally covered the holographic (Kismet), and I don't see much point in layering it, except for layering over colors like TL Design Bombay. But you could make the bottle last longer, as one coat is enough for layering. I had imagined that ILHK would look gorgeous over black, but after seeing how much it covered the darkest green, I don't think so. You can compare the layering with the picture below:


mi- ny: I love Hong Kong


As I've mentioned before, mi- ny is an Italian brand, and their nail polish is 3- Free, and not tested on animals :-)
(The other mi- ny polishes I have showed so far is the blue 'Blue Sky', and I've used that one and the mint colored 'Klimt' for nail art.)

mi- ny: I love Hong Kong

Have you seen a similar nail polish?

Lani

Sunday, March 24, 2013

Deborah Lippmann: Across the Universe & Snow Crystals/ Surface Hoar


Hello everyone!

Before you look at the photos, I have to tell you that I think this nail polish deserves photos of better quality. The photos were taken in low light, and the top coat has shrunk the nail polish. That's the reason why I haven't published them until now. Maybe I'll take new photos of Across the Universe by Deborah Lippmann again some time. But I wanted to show the ones that were taken with the snow crystals, so then I decided to include a few of the other photos too. So please try to imagine that the photos were taken with sufficient light, and don't look at the tips!

These photos were taken in January, after some weeks of very cold weather. This was before I got the Ott- Lite, so I hurried out to take the photos before the sun went down. The snow had turned into crystals, and I hadn't seen snow crystals like that before. So I took lots of photos with the polish together with the snow crystals, and then the sun went down. And it was one of these fantastic winter sunsets! So I tried to capture the sunset behind my Across the Universe nails. But needless to say, it's difficult to get a close up of four nails and the sun, so I'm not even going to show you those photos. And imagine how many photos that were useless because of the shrinkage... I don't remember any more why I added a second coat of Seche Vite, but I have written down that I did.

So, first I took photos inside by the window, then outside with "snow crystals" or "surface hoar" that I learned that they are called when I tried to google the phenomenon. Then when I came home, I mattified the polish, and I included a few of those pics too.

Inside: 3 coats of Across The Universe+ 1 coat of Seche Vite


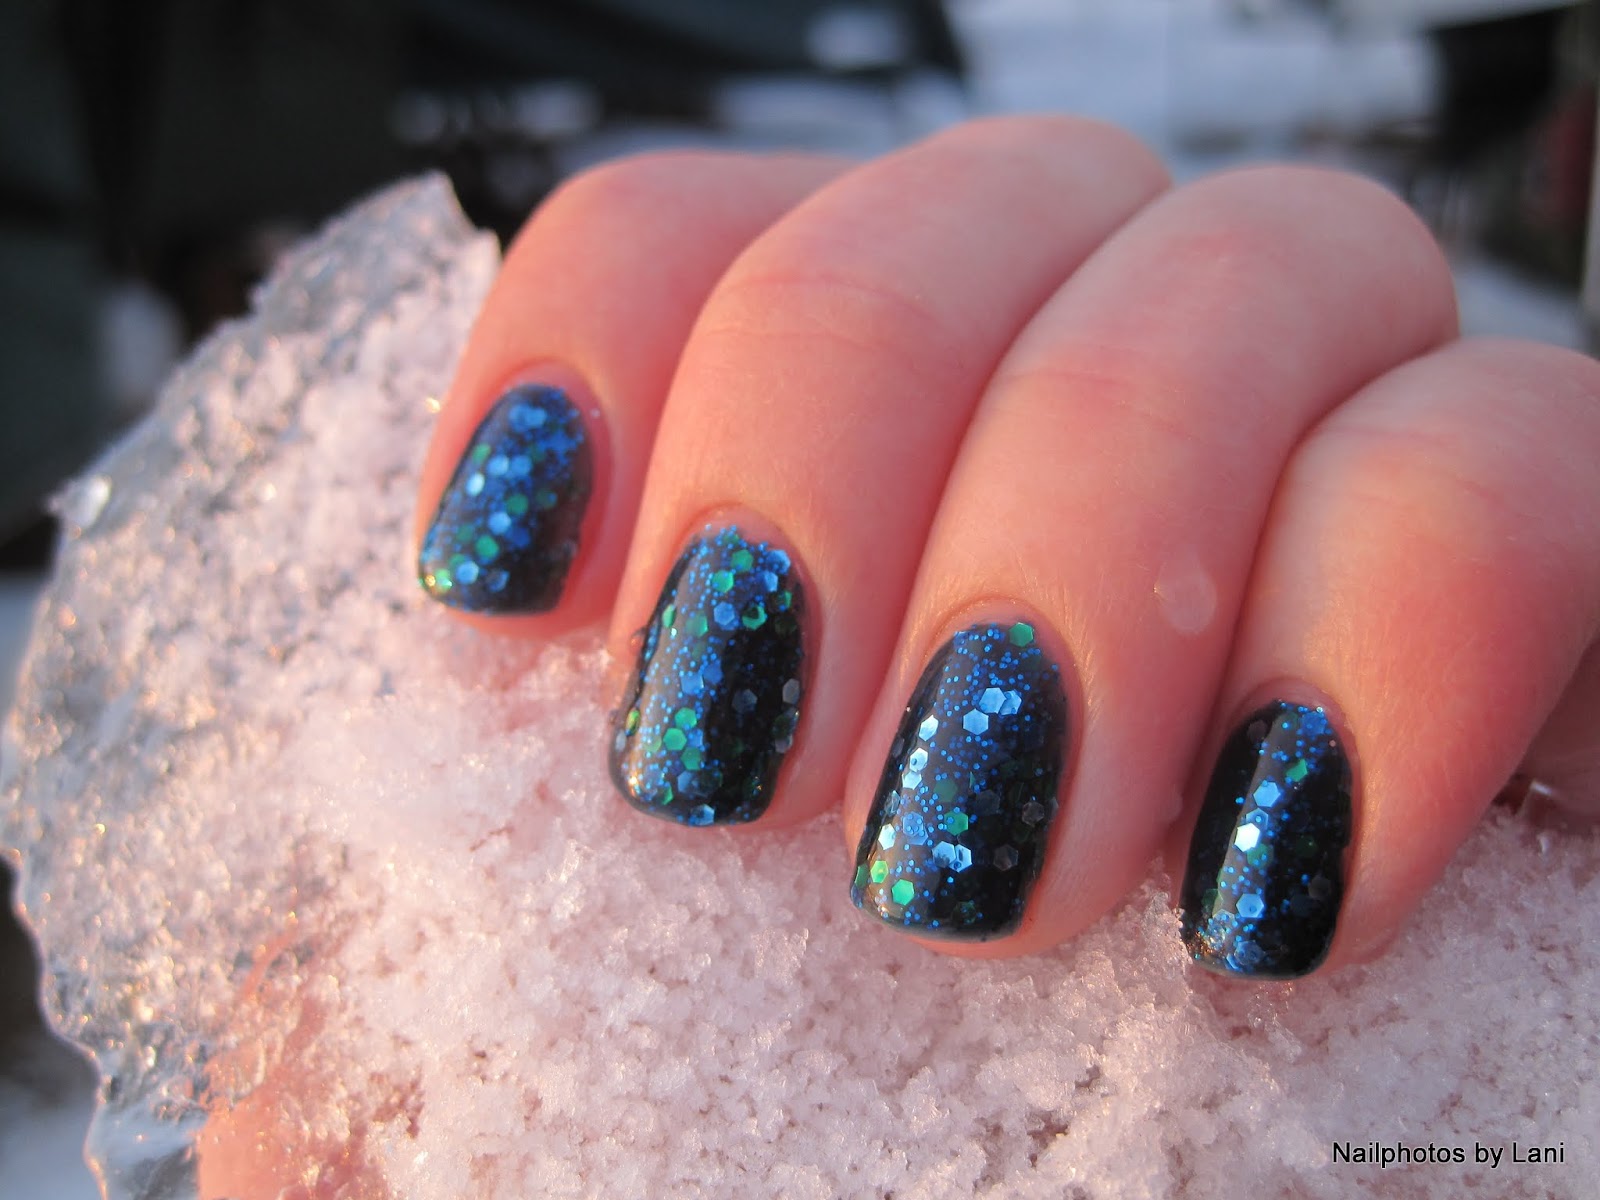
In the snow: 3 coats of Across The Universe+ 2 coats of Seche Vite


You can click on the snow crystal by the middle finger to enlarge
You can click on the image to enlarge


You can click on the snow crystals/ surface hoar to enlarge

You can click on the snow crystals/ surface hoar to enlarge

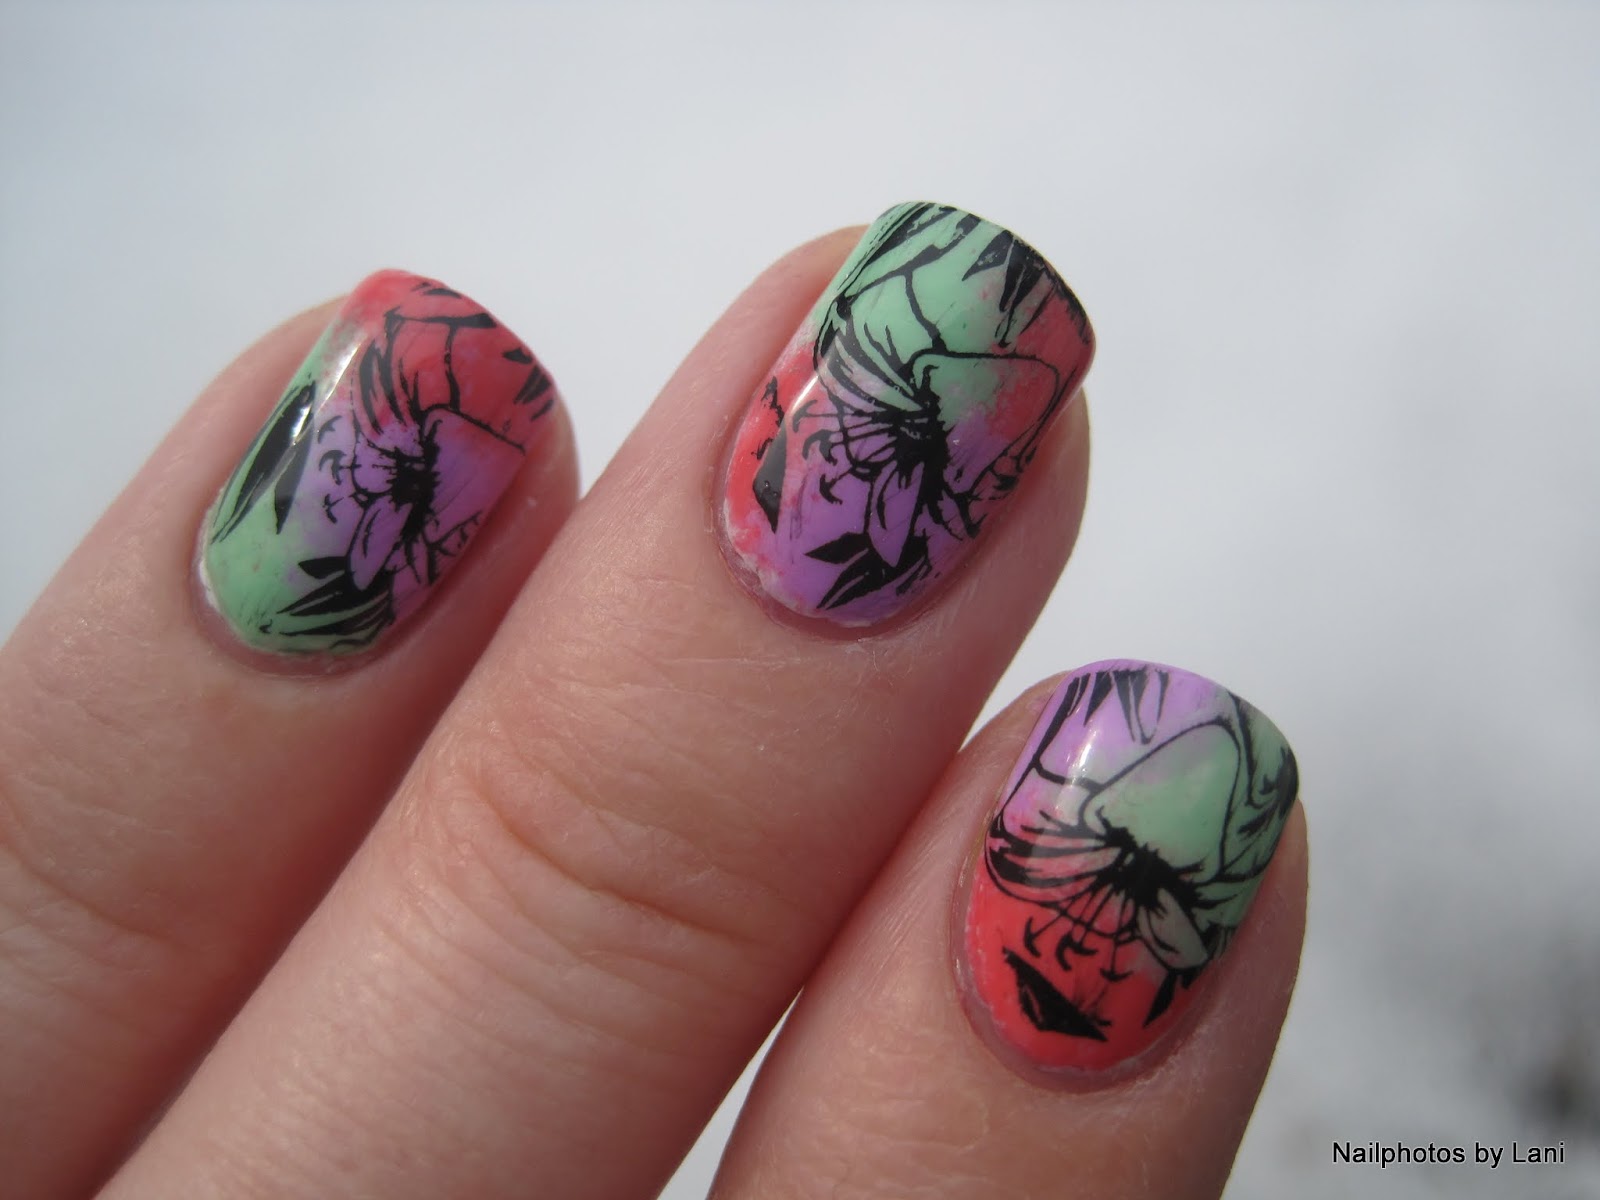
Inside: with matte top coat


About the nail polish:

Deborah Lippmann's Across the Universe is a dark blue jelly with blue and green hexagonal glitter, and I think the small hexagonal glitter is blue. I used 3 coats here, but earlier (before I started blogging) I layered it over a dark blue polish. I've also tried to layer it over green (TL Design Bombay) on a nail wheel, but didn't manage to apply an even coat. Deborah Lippmann nail polish is sold in many countries. If you live in the USA or Canada, you can order it online (Deborah LippmannNailPolishCanada, and others), but if you want to find a store near you, you can try her store locator.

And as I like to mention, Deborah Lippmann nail polishes are vegan, free of formaldehyde, toulene and dibutyl phtalate, and most important: not tested on animals :-)


EDIT: I've added some more info:

This is not a new nail polish, but it's still available. I bought this nail polish in September 2011 together with the 'Get this party started' set. But according to All Lacquered Up, 'Across the Universe' is from Deborah Lippmann's Fall 2010 collection.
Deborah Lippmann polishes are quite expensive, but where I live they are just a little more expensive than OPI, but cheaper than Chanel and Dior. I've seen pictures of a dupe called Essence 'Blue Addicted', which comes in a smaller bottle, but is much cheaper. Here is a comparison made by Spector's Nails. Gina Tricot made a glitter last summer with similar colors, but it looks very different. It's called #77 'Monaco blue' and is a bit similar to Deborah Lippmann's 'Across the Universe', but with small green and blue glitter instead of big, in addition to large silver glitter. But I couldn't find it on Gina Tricot's web shop now, so I don't know if it's still available.


Lani

Friday, March 22, 2013

The Tri- Polish Challenge: Day 2, Easter Eggs & Bunny


Hello everyone!


When I had bought Easter water decals, I saw this Easter/ Spring nail art by Shannara (from Nails and Stuff). So although this looks very different from hers, I got the idea to make a gradient as a background for the water decals from her water decal nail art.

Edited (April 12th 2014): This is my entry for Nail Polish Canada's Easter Nail Art Challenge. You can see all the entries and vote for your favourite, and submit your entry here. (I think you have to sign up here before submitting your entry, before the deadline; April 16th. 2014) When I was invited to participate in this challenge, I got a funny email, and I love these words:

"Why paint an egg when you can paint your nails?"


I made this nail art in the last minute. If I had started earlier, I might have taken everything off because the surface of my nails became very bumpy after making the gradient, and I also managed to get some tiny hairs on when I top coated. But miraculously the second coat of top coat helped.


I started with white nails, used a sponge to make the gradient, and applied two thick coats of top coat. Then I applied the water decals. I wish my nails were longer. I cut one of the water decals, because I wasn't sure there would be enough room on my index finger. I had decided to try fake nails, but wasn't sure how to do it. And now I let the nails dry while I'm writing, before I'll apply one more coat of top coat.


If you wonder how to use water decals, I've taken photos of how I did it in the panda nails post. But basically, you cut out the image, hold it with tweezers, and dip it in a glass of lukewarm water for about 15 seconds, wet the nail you want it on, and carefully slide it over to the nail (use a wet finger for that), dry it carefully with some tissue paper, let it dry, and add top coat.


As you see, I only used two of the Tri- Polish colors today: green and purple. Here is a list of what I used:

OPI: My Boyfriend Scales Walls- white
H&M: Mint Madness- green
Linda Johansen Nail Candy: Lilac Lilly- purple
sponge
base coat & a lot of top coat
N.NAIL Easter Water Decals Nail Art- WDBLE402 (These were not a gift from KKCenterHk. I bought these myself. But I do have a coupon code that will give you 10% off. You can find it on the right side.)


I'm sorry for posting a little late. I hope it's OK that I'm using water decals. Now I'm very curious about what the others have made.


Lani

Tuesday, March 19, 2013

The Tri- Polish Challenge: Day 1, Lily Nails


Hello everyone!


I have chosen one purple, green and coral nail polish for the Tri- Polish Challenge. That means that the polishes will have to work together for 4 manis this month. I have to use all 3 polishes in one of the manis. There's no theme, and we are allowed to use white, black, gold, silver, and glitter toppers. And next month we will get three other colors, and have to find one polish to represent each color again, and again, month after month. You can find out more about the challenge and how to join in here. But I want to mention that according to Debbie Crumpet, Ashley from Smashley Sparkles is the one who had the original idea.


The 3 polishes I chose:

H&M: Mint Madness- green
Linda Johansen Nail Candy: Lilac Lilly- purple
H&M: Coral Road (also used here)- coral


What I did:

I started with white nails, sponged the 3 polishes on, top coated. (I didn't want them to turn brown this time, so I was careful so that the colors didn't overlap much.) Then I stamped black lilies, using Konad black stamping polish and the lily images on two Bundle Monster stamping plates: BM- 314 & BM- 325.

The palette


And now you can take a look at what the other participants have made, and which polishes they have chosen. Because I'm posting so late, I've already had a look at some of them, and I was very curious. I like that we are so artistically free, and I hope that the challenge will stay that way. For me it's very interesting to see how different manis we make with these three colors.

Lani